|
|
Questions |
and Tools |
|
Hello Mr. Labiste. My name is Glenn and I am interested in all aspects of how man used to live with the earth. I am semi-skilled in stone knapping, fire making with bow and hand drills, bow and arrow construction and edible plants, but have struggled with cordage, particularly with splicing. I have seen your dogbane video and appreciate you sharing your knowledge. Is there anyone you know of in Suffolk, Va. that may be willing to get me through that part? Thanks.
Hello Glenn;
I don't know of anyone in your area who can help you learn how to splice cordage. Hopefully, my text explanation below might be of some help.
When you are running out of fibers on one side of your ply, lay your splice of new fibers along side the short bunch of fibers. I usually stick an inch of the end of the new fibers in between the upside down V-shaped portion of your 2-ply cordage. This is the area that is your last twisted cordage and the same area where your two bunch of unplyed fibers are separate. Continue twisting the short bunch of fibers and the new fibers together. Also, continue twisting the other half of your bunch of fibers. Bring the the 2 twisted fibers together and continue plying. When splicing, your cordage should not have a lump in the area you have just spliced. This happens when you add too much of the new fibers. Try to have an equal amount of fibers in both of the untwisted fibers. Thinning out the short bunch of fibers will help to accommodate the addition of the new fibers.
If you are still having difficulty splicing, look at Norm Kidder's article on cordage on the PrimitiveWays website. Access the webpage below.
http://www.primitiveways.com/cordage.html
Also, check out other YouTube videos on cordage making. Weed out the videos that have lousy information. There might be some instructions on how to splice in new fibers in some of the "how to" videos.
Regards,
Dino Labiste
Hello,
My name is Phillip Douget and I work for Louisiana State Parks. I'm
an interprative wage worker at a state historic site. I was inquiring
on how I could build a fish trap. We have plenty of twine
and river cane on hand but thats about it.
Well, any advice would greatly be appericated.
Phillip Douget
Phillip, first, if you can get ahold
of a copy of the Bulletin of Primitive Technology #25, from the
spring of 2003. There are a couple of illustrations of fish
traps in that issue, which is themed around fishing.
If you are using rivercane and twine, you will have an easier
time if you can split the rivercane down the long way. Use
the split pieces (1/4 inch diameter) for the main ribs, then further
split some cane down to 1/8th inch by 1/4 inch. Use these
to make circles of graduated sizes (the large opening should be
at least 18 inches in diameter) and lash the long cane to the
circles, using clove hitches until you have a long cone. (4 to
6 or more feet). Make sure that no opening in the trap is
big enough for the fish to escape. Using shorter pieces
(18 to 24 inches), make an inner cone, with the large diameter
equal to the long cones bigger end, and tapering down to the size
of the fish you hope to catch. Tie this cone inside the
long cone. Place the trap into the current, preferably when
fish are migrating upstream. (The diameter of the trap opening
should ideally be equal to the depth of the stream where it will
be placed.) To increase yield, block off the rest of the
stream with sticks pounded into the stream bed, or whatever else
works.
I don't have rivercane to work with, so I'm projecting a bit,
I'd use willow out here in California. I have a split bamboo
fish trap in my collection that I'm basing this on.
Norm Kidder
After watching your dogbane fiber demo, I wonder, is it possible to made cordage from corn husks (or maybe the stalks?) and how do you extract the fibers? I recently learned to use a drop spindle and would love to learn how to spin corn fibers.
Thank you.
Peni Jo Renner
Hi Peni;
Certain plant and animal fibers will work well with the drop spindle. The fibers should be fine and flexible, like cotton, dogbane, flax or wool. Short fibers should be able to bind onto itself, like the fibers in cotton and wool.
Corn husks can be made into cordage. You'll have to strip them into long thin pieces, then twist it into cordage. The corn husks are short, so you'll have to do a lot of splicing. Hydrate the corn husks first with water to make it pliable, then strip them before plying. In my opinion, corn husks don't work well with the drop spindle. The material is too short and it requires more work to constantly splice in stripped corn husks. But, experiment and give it a try.
Good luck on your project,
Dino Labiste
From: Susan Zakin
Subject: Reporter's query: tules vs. reeds
Susan, your question is based in a general confusion of the different types of marsh plants, which get lumped together as tules, or cattails or reeds. Tules are more accurately called bulrushes and are indeed sedges in the genus Scirpus. Cattails are a separate family all their own and reeds usually refers to large grasses such as phragmites, although an unrelated cattail-like plant is called Burreed. None of these names is very well fixed in the public mind. Rush chair seats for instance are made with cattail leaves. Sooo, the way you use these terms in your article depends on how `scientific' you are trying to be. I would use reeds to mean phragmites, and tule or bulrush to mean Scirpus spp. (including alkali bulrush - Scirpus robustus), and cattails to mean cattails.
Hope this has been helpful,
Norm
Thanks so much. That was actually very clear!
Susan
I found the Primitive Ways website very interesting and bookmarked it for future reference.
Can anyone on staff help me to understand the best means to harvest pine nuts from Pinus sabiana (aka Digger pine)? I have a supply of green cones currently.
Thank you for the guidance and the fine resources available at PrimitiveWays.com.
Regards,
Kent Jordan
(Chuck Kritzon responded to Kent's
e-mail)
Hi Kent;
Gathering Digger pine nuts is basically a race with the animals.
If you can get to fallen nuts that have not opened yet, just collect
them and then store them in a warm place until they open up. In
the heyday when I was gathering every year, I purchased a little
round kiddie pool to store them in. Then as they opened, I took
a stick a knocked them around to release the nuts, this kept them
in one place for ease of gathering. How ever you process them
its a sticky messy job. I also recommend using a cheap pair of
canvas garden gloves as the hooks on the ends of the cone segments
are VERY sharp. The gloves will become very sticky. When this
happens just take some dry dirt and rub the gloves together.
The best place to find loose pine nuts is along roadways in the Central Sierra foothills. Later in the season when the cones fall, they impact the roadway scattering the nuts. The traffic tends to keep the animals back. HWY 49 between Drytown and Jackson offers many good places to stop and gather.
The shells are very hard and were a primary bead material for many California Native Peoples. Simply abrade off the ends and poke out the nut meat and eat it or rub it into the shell for a shine. They crack easily between two stones though and are worth the effort. Their food value was used by Maidu mothers who would feed a newborn a very fine gruel of pine nuts if she was having trouble with her milk coming in. The Native people would roast them by tossing the pine nuts in the air with hot coals with a flat basket. If the cones are placed in coals they tend to ignite due to the pitch. While you are gather pine nuts keep an eye out for the sap blisters that form over the branch where the cone detached. Some of these blisters can be fist sized. Pine pitch has many uses as you can read about at the PrimitiveWays site.
FYI: The Digger pine was named after the use of the now derogatory term, "digger indians" which the settlers and miners developed by their observation of the Native Women who they often saw digging for foodstuffs with their sticks. Ghost pine and Yellow pine are alternatives. Good luck with your gathering,
Regards,
Chuck Kritzon
Hi Dino,
Loved your article on making the drum. I make figurative sculptures
of Native Americans, and thanks to your excellent article, will
be able to add a drum on occasion. I liked your parting comment
about being alive again and singing. Its almost like giving birth
and caring for another.
I do have a question for you. I would like to paint symbols on
the deer hide. What type of paint do you use. I'd appreciate any
suggestions you would be willing to share.
Thanks so much,
April Walton
Hello April;
Thank you for your nice comments on my "Sycamore Membranophone"
article.
I painted the drumhead with the juice from olive berries. An olive tree was growing near a creek. When the berries ripened, they made an excellent paint source for creating designs on the deer rawhide. The color was a deep reddish brown. Also experiment with the juice from blackberries or any berry that has a dark color.
Colored minerals from the earth can be
powdered and mixed with a binder, like egg yolk, rendered fat,
lard, salmon roe, or even saliva. You must finely powder the earth
pigments to the consistency of flour or you'll get lumps in your
painting.
Also finely, powdered charcoal from an open pit fire will give
you a nice black color. Collecting the soot from burning pine
pitch will provide an even better source for black pigment.
Sincerely,
Dino Labiste
Howdy, howdy, howdy Norm! I just found your site on the internet and you've done a beautiful job (along with your co-workers). Gaia and Kodiak and I have moved to the B.C. Coast and plan to settle on Quadra Island. We are tentatively looking at hosting a skills gathering during the summer of 2003.
I have a couple of questions for you. Joe Dabill made some very nice hand drill sets a few years ago from "coastal elderberry" with an alder board. I assume he means the red elderberry, Sambucus racemosa, and alder wood from the trunk or branch, rather than the root. Do you recall or have any thoughts on these materials? I have not yet tried the red elderberry, but the blue species I found to have too much pith and not enough side wall.
Do you have any information on what the Natives of Coastal B.C. used for hand drill fire sets? We have clematis and some cattail here. I have used big-leaf maple shoots, but found them effective only on a very soft board. They make for a hot combination with a sotol board, but that's far from local availability. I almost certainly have tried the maple shoots on an alder board (trunk), though I can't remember for 100% certainty. I doubt that I've tried the maple shoots on clematis vine. Of course, mullein grows here. So, there are materials available for hand drill sets here, but what were the natives using?
Keep in touch.
Chris Morasky
Chris, good to here from you. Sounds like life's an adventure.
As to fire stuff. Red elderberry that I've checked out has less side wall than Blue Elderberry, but that is totally variable depending on how shaded it is. Full sun on blue elderberry gives lots of side wall, but not usually straight. Too much shade and you get really long straight and useless pieces. Elderberry growing in partial shade or fairly deep valleys provides straight pieces with enough sidewall. I don't remember for sure what Joe Dabill was using. I would think alder root would work better than the wood. Willow seems to be like that too. I have some alder lumber that I'll have to try. My experience with Big-leaf Maple is that only the water sprouts (root suckers) are low enough density to be any good. The same with cottonwood and buckeye. As to what the natives used, my vague recollection is that they used cedar for everything, including hearth boards. Drills can also be cedar I think, although good elderberry, mulefat etc. should work well also. I think I have an ethnobotany of B.C. at work, I'll see what I can find and let you know.
Norm
Hi,
I am a senior at the University of Hartford in Connecticut. I
am currently enrolled in a Native American Culture lecture and
for a class project I have to build a kayak. This seems like the
most realistic model ["4 Hour Kayak" article in PrimitiveWays]
I have found and would like more information. Where can I find
"green willow shoots". . . .
Along almost any stream. Look for a shrub
sized tree with small oval shaped leaves and green or light brown
bark. The shoots will take a bend without breaking.
. . . . and how much do I need?
Fourteen 10 feet willows and fourteen 7 feet willows, but cut extra also.
Is there a substitute?
You can use any flexible branches or saplings that do not taper too radically.
Bob Gillis
Anything that you can pass my way would be greatly appreciated.
Thanks,
Stephen Santangelo
Research Asst.
Micro CT Lab
University of Connecticut Health Center
Farmington, Connecticut 06034
I live in Asia with my four boys. I can purchase Water Buffalo hides very cheap, but have no way of tanning them so my boys can tool on the leather as I did as a boy in S. Texas. Do you have a tanning recipe solution.
Regi Schexnider
Hello Regi;
The simplest tanning recipe is to use the brains of the animal
as the tanning solution. After you have scraped and prepared the
hide, take the brain of the animal and cook it in a pot. Then
blend the cooked brain into a fine milk shake consistency (using
a blender or mashing with your hands). Put the mashed brains into
a bucket or tub and add hot water. You need add only enough water
to the brain to cover the hide, plus a little more. If you can
leave your hand in the hot solution without any discomfort, then
the temperature is OK. Anything that burns your hand will cook
and damage your hide. Soak your raw hide in water until it is
pliable, then wring it dry and stretch the hide open. After the
preliminary stretching, place it into the warm brain solution
for two hours or overnight. When you are ready, wring the hide
thoroughly and begin stretching until the hide is soft and dry.
Have fun on your tanning project,
Dino Labiste
Dino,
Thanks for writing me with this tanning solution for Water Buffalo
hides. I am a little squeamish when it comes to animal brains
but I have some neighbors that live above me that are from the
Carolinas that I am sure have done this type thing. They have
3 girls and may not mind helping me on this project.
I am surprised there is no salt in this solution; I have prepared alligator hides in S. Louisiana with salt brine. Thanks again for your help. I'll ask my other Cajun family friends to start cleaning the Water Buffalo hides and making sure they get all the extra flesh off. I saw a documentary one time on Eskimos and they had their grandparents chew the excess flesh and the hide to keep it soft. We have no one old enough here to take this role, though my Cajun friends wife has lived on the Bayou a long time and would probably be suitable.
Thanks for your help,
Regi
Hello Regi;
If you don't want to use animal brains, here is another tanning
recipe. I've used it on the American buffalo hide that I am working
on. The hide is on a rack. I coat the solution with my hands,
let it dry slightly, then using a wooden paddle that I made from
an axe handle, procede to push and stretch the paddle into the
hide. Here is the tanning recipe for one coating:
10 yolks
5 tablespoons of vegetable oil
Quarter bar of Ivory soap (grate bar of soap with cheese grater)
3 quarts of water
Depending on how soft and pliable you want the hide, I use 4 seperate coatings of the solution to make a buffalo robe. For each coating, I work the hide until it's dry, then pre-smoke it. Three coatings are done on the rack and the final coating is rubbing the hide on a cable.
Hope this information helps you,
Dino Labiste
P.S.
I suspect that your use of salt brine on the alligator hides was
used for preserving the hide. The final smoking helps to preserve
a softened hide, as well as keep the hide from returning to rawhide
when it gets wet. Did your alligator hide turn into a pliable
leather or just rawhide when you used the salt brine?
I just pruned our elderberry tree and want to try making a flute. Are there guidelines for best temperatures and humidity for drying the wood?
Thanks,
Joyce
Joyce;
Drying goes faster if you put the wood in a hot dry place, I often
use the dashboard of my truck. Rapid drying does run the risk
of spits on the ends, so I try to cut staves a feww inches longer
than I will need. The wood will shrink in diameter as it dries,
so make sure the piece is a bit bigger than you will want. For
a flute, I like to use a piece about a foot long, and with an
inside diameter (once dry and hollowed out) of 5/8 inch.
Good luck,
Norm
Hi Bill,
I was wondering if the tail bone (in a fox or anything) needs
to be removed before tanning?
John Weinhofer
Hi John;
The most important thing to realize is that there is meat on the
tailbone. Left untreated, it will either dry out or rot. Bad news
either way. It won't look or feel as good unless it is braintanned.
The tail bone can be removed with a bit of perservence. To braintan any hide, the flesh side has to be scraped clean of the membrane layer. If you just want to peserve the tail, you can cure it with borax. That is curing, not tanning. You could probably freezedry the tail without removing the bone and meat, but I have not ever tried that method. Do some investigating and see what you come up with.
So, to make a long story short, yes the tailbone, meat and membrane layer must be removed if you are going to use the braintan method of tanning. Be gentle with the foxtail. They are thin skinned and will tear easily.
Good luck
Bill Scherer
Hi Norm;
I went to a nearby pond yesterday and wrestled with the cattails.
I managed to yank out 8 or 10 knobby rhizomes. I tried peeling
them and boiling them for 30 minutes. At the end, they looked
as toughly fibrous as they had at the beginning. The kids joined
in with lighthearted bravery and we all chawed on them. "Hmm...tastes
like hempen rope! " It was hard to liberate the starch with
our teeth. The smallest rhizomes, say 3/8 inch in diameter, were
crunchy and tasty, like a carrot. Quite good, actually. The white
core of the new baby plants--boiled for 15 minutes--were perfectly
acceptable, too. I'm much more interested in the starchy stuff,
though, since that is what is scarce in the woods.
I think that next time I'll try to mash them up with a pestle or the like, and liberate the starch into a bowl. A kitchen crushing tool might be more effective than my teeth. I'm hoping that approach will have a higher food value to effort ratio. Do you have a preparation method that you recommend?
Also, do you resign yourself to wet shoes and socks, or do you have a harvesting trick to prevent that? It was 52 degrees, and I'm a wimp, so I wrapped my feet and legs in kitchen trash bags. My legs stayed dry, but both feet were squelchy.
I hope that you are doing well!
Rhona Mahony
Rhona, sounds like you're getting into this. Euell Gibbons (if you remember him) basically bashed the rhyzomes up and soaked the mash in a bucket of water. Once separated by running it through cheesecloth and letting the starch settle out, he used it like flour. I've prepared them by baking/roasting the runners under the coals of a fire (in the hot ash layer) - they taste like fibery sweet potatoes. The new shoots are even good raw, and taste like cucumber. The main base of the plant I haven't had much luck with, but there are so many rhyzomes I won't starve. Latter on, the flower tops can also be eaten. I have cooked the female flowers while still in their leaf sheath like corn on the cob. They taste like green beans. This is best with the wide leaf cattail species. I avoid the male flowers because I'm allergic to the pollen, but Dick collects the pollen and uses it like flour. As to collecting, it's a pretty mucky affair. The rhyzomes are best harvested in wet mud, so........ do your best.
Good to hear from you,
Norm
Hey;
My name is Brad and I'm in the process of tanning a fox pelt using
your instructions. I'm not sure if it's going to come out right,
but I had a few questions for the next time that I attempt this.
How do the hunters/trappers skin the foxes that you use? Do
they cut down the stomach to remove the fur, because it looks
like they just took it off like a sweater, according to your website
pictures. Or did you sew the pelt up somehow?
When cleaning up the hide, do you have to get every bit of tissue
off? I got all the meat and fat, but there was still some tissue
stuff that just seemed like it would take hours and hours to get
off? I used a of couple rocks and sandpaper to abrade the hide,
but that didn't work very well. Maybe I needed a rougher grit
sandpaper.
It just so happened that I shot the fox in the head, so needless to say, there were no brains for me to use. Instead, my dad shot a deer the day before and I used the deer brains. The slurry came out to look exactly like what your pictures. I was just wondering if it mattered what kind of brains you use or if they're all the same? I wasn't sure how long to cook the brains, so I just cooked them for about 10 minutes on medium-high heat. Is this crucial how long they are cooked? I left the brains on for 2 hours. You live in sunny California and I live in Maryland. It's about 45 degrees outside. So, does the hide need to be in a warm area for the brains to penetrate the skin? Do you remove the brains after 2 hours? Do you soak the hide in something? Do you just stretch it with the brains on it? Do you stretch it constantly until it dries? Or do you stretch it every couple of hours or so?
I'm sorry I didn't think I had this many questions when I started,
but any replies would be greatly appreciated. Thank you for your
website and I look forward to trying this again with a little
bit better idea of what I'm doing.
Brad
Hello Brad;
Thank you for visiting the PrimitiveWays website. Studying and
practicing the old ways is a lot of fun. I will try to answer
your questions in the order that you wrote them There are many
ways to tan furs, not a lot of hard rules. I have tanned quite
a few fur bearing critters, and a lot more deer hides, so here
goes.
Most small fur bearing animals are "case skinned", meaning they are taken off like a sock. The largest animal I have "cased" is a coyote. Try to do most of your cutting from the flesh side to the outside, as this will leave the hair intact.
The skin of the ankles of all 4 legs are cut all the way around. Then the skin of the each rear legs is cut all the way up to the crotch, right under the base of the tail. Start peeling the skin off each leg. You may wish to cut off the tail bone now, or peel the tail bone out later. Either way, the tail must be slit on the bottom, and all themeat and bone removed. Be very careful as the tail is quite thin and easy to tear. Any way, once the legs and tail are clear, the pelt can be peeled off all the way up. The only sticking points will be on the ears and nose, but since you shot his head off that should not be an issue.
The cleaner the hide, the easier it will tan. The worst is around the head with all of its nooks and crannies. The abdomen and legs should clean up quite easily. Most of that cleaning can be done with a fleshing bar on the beaming log. Then wipe the flesh side down with alcohol. That will remove most of the grease/fat. Finally. it is time to use the abrading type tools as a final cleanup. Be very gentle as canine hide are real thin and can tear easily. The first time you do any task it takes longer than if you are experienced. Take your time, be carefull, and enjoy the work.
I have used deer, pork, and antelope brains. They all work. There are also some comercialsubstitutes, but I have not tried them yet. So I can't say much about them. Cooking of brains is a safety precaution. They could be used raw. I think 10 minutes at a low boil would be plenty.
Temperature is a very important point. The warmer the temperature of the brains, the better they soak into the pelt. Try to use a heated shed, or freeze the pelt until summer.
After the pelt has been brained for a
hour or two, take it out and gently stretch it acrossa stake.
Most of the brains will have soaked in, a little excess can be
discarded.You can then stretch it as much as you wish. The best
way to insure that you will have a nice pelt is to work it more
or less constantly until it is dry. This is most important at
the end, when it is turning from
just damp to absolutly dry. If you miss this stage the hide will
turn rather stiff.
I hope this helps. A hands-on teaching is much better way of learning this kind of thing. If you ever have a chance to work with someone who has done this sort of thing, you will learn much more than through written text. But it can be done.
Good luck and happy tanning,
Bill Scherer
Ken:
I have gathered some acorns. How do you make them edible?
Donald Parker
Donald:
Due to the high concentration of tanins, the ground acorn meats
have to be thoroughly leached to remove the bitter flavor. Then
it can be prepared in a number of ways: adding to baking recipes,
cooking into a mush, baking into patties, etc. I highly recommend
the following book as a great reference on how to prepare acorns
for eating: "It Will Live Forever", by Beverly Ortiz,
published by Heyday Books.
Happy eating!
Ken Peek
New to the tanning and of all the processes I have encountered
yours seems to be the easiest. If you ever find out what to do
with the hides after they are tanned let me know. I am dating
a guy that comes from a long line of trappers and would like to
use some of the pelts rather that selling them all. We have been
averaging about 10 coons a weekend, but this weekend we got skunked,
smelly animals, but their coats are beautiful and being I do not
get much $ from them I would like to try and do something productive
with the hides. Anyhow, if you can point me in the direction of
some web pages I would greatly appreciate it.
Roberta Conway
Hello Roberta;
I'm at the stage now where I have enough furs and hides for my
own uses. The last few hides I have tanned have been for other
people. I have a fur hat (coyote), a river otter quiver, and some
beaver that will be sewn into a sleeping blanket. Still haven't
done anything with the fox pelts. I think my daughter will have
the sharpest looking foxskin hat in her elementry school (and
the only one). I have two raccoon pelts that I should do something
with as well. I like to save my pelt sewing projects for the winter,.
That way I can do something primitive while being inside the house.
Check out the article, "What to Do with Your Roadkill Raccoon
Skin? Make a Bag!", by my friend, Markus Klek, on the primitiveways
website. I plan on something like that with one of my pelts. There
are some patterns available from Crazy Crow traders and braintan.com.
One pattern I have is the "free trappers hat", sorta
like a Daniel Boone thing with a leather visor. I know one guy
who said his daughters used muskrat pelts to play with instead
of dolls.
Good luck and keep in touch.
Bill Scherer
I'm a new member of the Society of Primitive Technology (SPT),
and love all that SPT has to offer. Recently I've come across
roadkill birds (usually turkeys). I'd like to use the feathers
for fletching arrows. I'd also like to use an entire wing for
a fan for smudging, fires, etc. The problem is that the last time
I tried to cure an entire wing, it was riddled with maggots! The
bird looked like it was in good condition initially. How do you
cure an entire wing, and what is the best way to remove the feathers
for arrows? Any help would be greatly appreciated.
Thanks,
Darren T. Cooke
CA State Park Ranger
Indian Grinding Rock SHP
Hello Darren;
Good to hear you joined the Society of Primitive Technology and
became a member. The non-profit organization appreciates your
help. You'll also receive your two, yearly issues of the "Bulletin
of Primitive Technology", the SPTs periodical that contains
various articles on early technology and Stone Age skills.
There are several ways to cure a bird wing. First of all, you can either skin the bird wing by carefully removing all the meat and bones in the wing (keep the skin and feathers only) or you can just cut off the wing at the joints, remove as much of the meat as possible and keep the bones on the skin and feathers. Here are two ways for curing the wing:
1) Sprinkle the entire wing with Borax,
let it sit for a few days in the hot sun until the skin dries
up, then dust off the Borax. Pour a generous amount of Borax on
the inside of the skin and bone area.
2) Mix an equal part of water and rock salt, submerge the entire
wing in the solution for 2 weeks, rinse out the wing in fresh
water, then let it dry in the sun.
When you find a roadkill and it has been out in the open for sometime, flies may have deposited their eggs on the carcass. The incubation period is short for insects and the fly eggs, when given the right amount of heat and moisture, will hatch immediately into maggots. Process your bird wing as soon as possible. When you have your wing skinned out, you may proceed to cure the wing by the above methods or if you do not have the time to cure it, place the wing in a ziplock bag and freeze it. The freezing process will kill most insect eggs. Then when you have the time, thaw out the wing and cure it. Freezing will also help kill any mites that could be on the feathers.
To remove the feathers you may either use these two methods. Carefully pluck the feathers by hand. Grasp the lower tip of the quill and gently pry out the feather. If the roadkill is fresh and the sinew and meat has not dried out, the quill will pull out easily. The other method is to heat up some water and pour the hot fluid only on the area of the quill that is adhering to the skin. You do not want to get the feathers wet. The feathers should pluck out with ease.
Good luck on your project,
Dino Labiste
Dear Mr. Scherer,
I am sorry to bother you, but I recently came across an article of yours on the internet at http://www.primitiveways.com/foxtan/Tanafox.htm. I have never done this before and am not sure where to start. I am using your article as my main reference. I only have the tail and wish to tan it so it does not become stiff. I am attempting to learn as much as I can and gather all the needed materials before starting this task. One question I have is that in your picture of smoking the two pelts I noticed that it did not look like you smoked the tail, but only the body and up where the leg of the jeans started. Also, is your planner blade like a razor blade or is it just a flat blade that is duller. Is there a substitute for brains if I cannot find them?
I was wondering if you had any other tips or for someone not so familiar with this.
Thank you,
Sean Burke
Hello Sean;
Never a problem to talk about tanning. As for the tail smoking, this has been a problem I have never come up with a good solution. I don't remember what I did for those particular foxes in the article, but Here is a few things I have done throuhout the years.
1. This one gave me the best results, but takes the most time. Sew the tail skin into a split in the tanning skirt. This leaves the flesh side exposed to the smoke, but not the fur.
2. The second method is to hold the tail by hand into a stream of smoke, directing the smoke onto the flesh side of the skin. This is done when tanning a deerskin, and some smoke is leaking out of the deerskin where there is a hole.
I would like encourage you to try tanning an entire pelt, not just the tail. The tail is a very fragile piece, and cannines are very thin skinned creatures.
Good luck,
Bill
The planer blade for scraping the fat, meat and membrane off the hide is not sharp like a razor blade. It's edge is bevelled on one side. You can substitute brains with egg yolks. There is a formula, if you use egg yolks.
Regards,
Dino Labiste
Mr. Kidder: For a fictional book I'm
currently researching, I'd like to know which central California
tribes (Yosemite, Central Valley, Monterey-SF coast) used tule.
If you can quickly tell me a few names of tribes, I'd greatly
appreciate it.
Thank you,
Summer Brenner
Summer;
Tules were used by most, if not all central California tribes,
depending on their availability. All the people in the central
valley - Yokuts, Miwok, Patwin, Nisenan, Konkow, Maidu, Wintu
and Nomlaki; the Pomo around Clear Lake, all the Bay area people,
Ohlone (including the Monterey and Santa Cruz areas: Mutsun, Rumsien),
Miwok, Salinan. The only tribes that would not have used tule
were ones that didn't have access to them.
The were used for boats, roofs, bedding, mats, baskets, cradles, clothing, decoys and more, with each tribe having their own variations. Let me know if you need more specific info.
Norm Kidder
Dear Dino,
My son is making a tule boat for display at the Irvine Regional
Park in Orange County, California for his Eagle Scout Service
Project. We have located a source of reeds but are in need of
a "step by step" instruction on how to build the boat.
Your photos on the web site have been most helpful, but I know
there are many more steps and "tricks" involved. We
are hoping that you or Mr. Baugh can help us by directing us to
a site or book that would provide some instruction. Thanks for
your help!
Regards,
Allen C. Buchanan
Senior Vice President
Lee and Associates Commercial Real Estate Services
Hello Allen;
Let me recommend 3 books that might be of interest:
1. "Survival Arts of the Primitive Paiutes" by Margaret
M. Wheat, ISBN 0-87417-048-6
There's a chapter that details the making of a Paiute boat of
cattail and tule. The tule balsa, in this book, is a one person
boat. Good photos.
2. "Tule Technology, Northern Paiute Uses of Marsh Resources
in Western Nevada" by Catherine S. Fowler, Smithsonian Folklife
Series, Number 6
There's a chapter entitled, The Tule Balsa Boat, with 3 subtitles:
Constructing a Tule Balsa Boat, Tule Balsa Boats in Use, and Boats
in Other Areas.
3. "Survival Skills of Native California" by Paul Campbell,
ISBN 0-87905-921-4
There's a section called How California Indians Made Tule Balsas,
pgs. 390-395
All three books are good reference materials
for constructing a tule balsa. Keep in mind that every different
Native California culture that constructed tule boats had different
styles of design. The tule boat designs up north, south, and in
the Great Basin may look slightly different in construction. If
you are going to be true to the Gabrielino tule boat in your area,
do your research. I don't have any information on their style
of tule boats, but contacting the Gabrielino people in your area
might provide some insight. Also, Campbell's book deals more with
the California Native Americans down south, so his book may provide
some information.
Universities in your area may also help. Contact the Anthropology
Department or do research in the university libraries.
Or contact another member of our website group - Norm Kidder. Norm is the supervising naturalist at Sunol-Ohlone Regional Wilderness. His expertise is in the California Native American cultures. Norm and his wife, Jan (she's also a naturalist at Coyote Hills Regional Park), undertook a tule boat construction project a few years back and floated the boat from one regional park to another regional park in the bay. One of the tule boats is in the Coyote Hills Regional Park Visitor Center. You can contact Norm Kidder at atlatl1@aol.com
Hope this information helps,
Dino Labiste
Hello Allen,
I'm afraid I don't have a step-by-step set of instructions for
you. Last year I met a man from the Santa Ynez Chumash reservation
who said that he had made tule boats in the traditional way.
Two good books: "California Indian Watercraft" by Richard W. Cunningham, ISBN 0-945092-01-6 and "Survival Arts of the Primitive Paiutes" by Margaret M. Wheat, ISBN 0-87417-048-6. They are both good books.
Dick Baugh
(Question pertaining to how many hours for net making)
David, to answer your question I would need to know a couple of other details - what type of string is being used, and what is the guage of the net (size of the openings). The time taken is a function of how many knots need to be tied, and the number of times that a new piece has to be added in (how much string can be put on a netting needle at a time - i.e. the weight of the string. As an example, I made a net four feet by eleven feet with a distance between knots of three inches in about twenty hours out of heavy cotton string. For an experienced person, figure about 5 seconds per knot. To figure the number of knots in a 10' x 10' net, if the knots are two inches apart (good for catching medium sized fish) . . . . a quick calculation comes out to about 16 - 20 hours for your10' x 10' net for an experienced person who is very motivated and undistracted. Two or three times that for a novice. My other question, is a 10' x 10' net efficient for seining? It would seem that a longer narrower net would do better - maybe 5' x 20' or 30 feet.
Hope this helps,
Norm
Robert Bailey wrote:
In regards to your article on how to tan a fox hide, could I ask first, where the brains come from and how to properly prepare them for the tan, which seem to be a big secret in most of the articles I have read. I would like to try it myself, maybe even with a deer hide.
Thanks,
Robert
Hello Robert,
My usual source of tanning brains is a Asian supermarket about
a mile from my house. They sell pig brains, as well as some other
unusual parts of various animals. Some Mexican supermarkets sell
beef brains. Any large supermarket will probably be able to supply
beef or pork brains, although you might have to ask. When I was
growing up on my dads farm, we used to bury the cow heads along
with the entrails and other stuff we thought inedible. Try contacting
some local farmers, maybe they can help.
Sometimes I get the hides from hunters, so I usually ask them for the animal brains as well. One note of caution here is deer in some parts of the country are testing positive for Chronic Wasting Disease. So far CWD has not proven to jump species, but lets be careful until more data is in. If you live in one of these areas you probably should use a pork brain, or not use brains at all. As a substitute for brains you can substitute egg yokes, soap flakes or lechatin. I once used beaten egg yokes, and they worked fine.
Prepping the brain is a very simple thing. Step one: the brain must be squished into a thick liquid. The easiest way is a blender, egg beaters will work, or you could mash it up with your fingers. Put a little water into the blender, toss in the brain and hit puree. Step two: cook the brain for about 15 minutes, sort of a low boil. Cooking the brain is not really necessary for tanning, but will lessen any chances of infection should you have any cuts on your hands. I have never had any infections, but I know people who have. Of course I do not start any tanning if I have any cuts or sores on my hands. After the brain has cooled off enough where you can put your hands in without any pain, apply it to the hide. Too hot will cook the hide, too cold will not penetrate the hide as well.
There are a few variations on the brain prep. My latest experiments are to rinse out one of my smoking skirts, and add that sooty water to add to the brains. This has a few benefits, one is as a preservative to the brain. It also improves the smell (brains smell a bit funky). If you can, get an experienced tanner to show you the ropes. If you can get to one of the many primitive skills gathering, there is usually someone teaching brain tanning. There is much that can go wrong if you don't know what you are looking at. Check out the books and magazines section on the PrimitiveWays website, and pick up one of the books on the subject.
Good luck and keep in touch.
Bill Scherer
Dear Mr Kidder;
My name is Chris Steer. I have recently become interested in primitive
technology and was very interested to read about the beveled elderwood
flute in your article about musical instruments of Central America
(a longer standing hobby of mine is learning to play and make
folk wind insruments). I was wondering if you knew that this flute
is very similar to that played in parts of Europe and the Near
East,. In the Ukrain, it is known as a sopilka, in Macedonia as
shupilka, ,and in Bulgaria as a small kaval (these instruments
are in turn related to the Balkan kaval and the Arabic ney). I
have made a few elder "shupilkas", in much the same
style as in your article, but with a penny whistle scale..I have
a nicely lathe-turned one from Macedonia, which is fatter at the
blowing end and tapers a bit like a recorder. Interestingly, it
also tapers insde. It's bored out at three different widths. The
playing style used for kavals and what I use on the shupilka is
different to that in you article. I don't hold the flute straight
in front, like a South American quena, nor like a transverse flute,
but somewhere in between so that I am blowing on the "side"
of the bevel, a little bit out of the side of the mouth, using
the whistling shape you describe. Finally, I remember reading
about a long Ukrainian bevel flute used mainly at funerals, which
is commonly played with the humming techique you talk about.
Power to your elbow,
Chris Steer
Ceske Budejovice
Czech Republic
Chris, thank you for your information. I wrote that article you mentioned many years ago, and have sense learned more myself. Other people have told me about similar flutes in other parts of the world as well. Thank you for the very specific information from Europe. As to playing them, just this year a friend whom I had gotten started on the flutes had learned more from a Native American man and taught me to play it better, and as you described. I now play the elder flute held at about a 40% angle to one side, and stightly down, blowing across the farther beveled edge (the edge need not be beveled to get sound, but is more comfortable on the lips, and clearer toned). I find a number of effects are possible, somewhat like a didgeridoo, using changes inside the mouth to affect the sound. In California, from what I have been told, the flutes are not uniformly bored out beyond the natural hollow, they may be crooked, tapered or not. The holes don't correspond to the European scale, although I find many of mine can play traditional American or European tunes, half covering holes as necessary to change the pitch. I hope to rewrite my article someday soon, and may include the information you sent.
Thank you,
Norm Kidder
I have a question. I am brain tanning a deer hide. I have scraped it and will be soaking tonight. I'll apply the brain solution. I
will set that overnight, then smoke it tomorrow morning. How long should I smoke the hide?
Tom
Hello Tom;
I'm afraid there is no exact answer. There are a lot of variables that are specific to each deer hide you smoke. Such as: how thick the hide is, what fuel you are using, what color you want the hide to be, are you smoking both sides, and what method you are using. The smoking is done when the smoke has completely penetrated the hide and it is the color you want it to be. Make sure the hide is completely dry and pliable before you begin smoking, unless you are doing the presmoke method. There are whole chapters written about this subject, I suggest Matt Richards book, "Deerskins into Buckskins", "How to Tan With Natural Materials", "A Field Guide for Hunters and Gatherers and Buckskin", "The Ancient Art of Braintanning Buckskin", and "The Ancient Art of Braintanning" by Steven Edholm and Tamara Wilder.
Good luck,
Bill
Chuck,
I have been having a problem of finding a container to render
pitch with native materials. Short of getting into pottery (clay
is available in Louisiana). Boiling stones and bark or watertight
baskets do not work well.
Can you suggest a book on the subject?
Gerald
Hi Gerald!
Thanks for the question. Melting and working with pine sap and
pitch has always been a problem for me too. Even at the many primitive
skills classes I attended over the years, pitch was usually heated
up in a tin can!
In recent years I have been using shells of various types. Scallop shells although not large enough to do a big batch of pitch, works really well. They can be acquired at restaurant supply stores and some nature shops. I have tried using abalone shells which are larger, but they cannot take the heat and will delaminate and crack.
I have also used large flat stones placed over a low fire or one that has been heated in coals for a while. Then by using a stick to keep maneuvering the pitch as it melts, you can melt quite a lot of pitch. You can also improve a flat stone by pecking a slight depression in the surface with another stone. It would not take to long to actually make a slightly concave stone to process pitch with. You would have to be careful not to heat the stone to quickly as there is always the chance of the stone cracking or splitting.
To avoid any kind of thermal stress problem you can also shape a bowl out of soapstone (steatite) to heat pitch in. The soapstone can be heated repeatedly with out cracking or splitting. You can shape soapstone quickly using antler tools shaped as follows: grind or cut a fairly thick portion of an antler tine (approx. 1/2" to 3/4" diameter), at an angle to create a chisel shape. The tool can be used like this, but to make the tool really effective, file or grind with a sharp thin stone or modern saw to make tines out of the chisel shape like a stone sculptors chisel. This is really effective and allows you to shape the soapstone very quickly. This tool was used for shaping soapstone by the native peoples who inhabited the southeast region of the United States.
Another tip to making pitch, is to gather clean sap to start with. I always thought that you needed to used the clear sticky drips and blisters that form on pine trees, but you can also use the dry, hard patches of pitch that form on the branch where a pine cone has come off. It melts and can be used just as well as the clear sticky stuff. If you can find a place where logging is going on, you can climb through the piles of branches the loggers leave and gather buckets of this dry pitch. Many old timers have told me they prefer the dry patches of pitch over the sticky stuff. I like to gather sap this time of year as the patches tend to just snap off the branch and are less sticky to handle.
To actually mix the heated sap with ground charcoal, you don't even need to use a container. Just make a little mountain shape pile of the charcoal powder with a depression in the top so it looks like a volcano. Then you pour your melted sap into the depression then work the charcoal into it from the edges to the center. You can then just pick up the mixture and work it like taffy, pulling and stretching it until it is mixed. Keep plenty of charcoal dust on your fingers to keep it from sticking to you.
I hope this helps. Please get back in
touch with me with any follow up questions.
Chuck Kritzon
Chuck,
Yes, your hints were quite helpful. Thank you.
I know the technique of pecking a stone, I am quite an accomplished knapper. Using the pecking and abrading method, I have made some stone grinding tools for grain and getting the meat from nuts and acorns. Having cooked some of the best steaks ever eaten on flat stone I also know of the dangers of heating stone.
Using shell was a new idea, I read about it in your web page. The problem lies in my type of survival techniques. Depending on the location of the particular outing, i.e.. Louisiana, the may be no shell, and the only stone, if very lucky will be soft sand stone or low grade iron ore.
Your gracious response has given me some ideas. My problem in the past was starting with pitch laden particles and trying to render it (as you would lard.) Starting with nearly pure pitch in the first place, perhaps any "platform" could be used. I will try soil patties (mud pies) not even qualifying for pottery. The soil used could be placed on a bit of a earth pedestal as to allow a deeper bed of coals under it. I suppose any soil with enough tensile strength to retain its shape and dry quickly in the fire would work. Perhaps support by green sticks within. (brain storming as I go here) maybe several green twigs 9 inches long or so and pencil thick set up in a squat tipi fashion would support semi-clay bearing soil well enough to create a tall depression for heating. Ideas worth experimenting with.
Thank you for your help. My goal is to be able to produce enough pitch to water proof a cooking basket. Using a hide container, or other animal part for liquid boiling is sometimes difficult to obtain on some outings. I am however allowing a change of rules. "If you make it using primitive techniques and supplies it can come." This will open up the opportunity for hide glue, small pottery, and considerable amounts of cordage, as well as some tools.
Your help has been good. Thanks for the ideas.
Do you know of any primitive skills gatherings anytime soon? And
with in about 800 miles of NorthWest Louisiana? Having found these
sources on the web has been a boon. I've been doing, learning,
teaching and researching "survival techniques" since
I was in my teens (nearly 30 years) finding the web has been great!
Gerald
Hello again Gerald,
I had another thought about a container for heating pitch. I have
never tried it, but a turtle shell should hold together long enough
to heat pitch. I don't think it could stand up to intense heat
or repeated heating as it would delaminate, but with the steady
heat of a bed of coals it should work. This is only a guess. I
know you have turtles in your area so I thought I would pass on
the idea. Plus snappers are pretty good eating!
Good luck and let me know how it works if you try out this technique.
Regards,
Chuck Kritzon
PrimitiveWays clan
Chuck;
I have had an opportunity to experiment with different methods
of working pitch. I have worked in a simple, crude pottery and
found it to work fine. This weekend, on an outing, I found a Three
toed box turtle shell. All that had remained was the shell plates.
It held together for several batches of pitch. After a while the
fractures became porous to the pitch and it
eventually broke. But not until I had melted and cleaned a sandwich
size, zip lock bag full of pine sap. The short of it is that it
will work even with an old shell.
Gerald
Dear Mr. Scherer;
Do you have any idea how to process squirrel skins so that they
would be soft and pliable? And what is "braining". Can
you give me the exact ingredients?
Sorry if I took your time. Please do write back. Thank you
very much?
Most graciously,
Dave
Hi Dave;
There is a lot of factors that go into making a fur pelt soft.
The biggest factor is how much work the tanner wants to put into
the pelt. Braining is applying mashed up animal brains and a bit
of water mixture to the flesh side of the pelt. Basically, you
put some brains into a blender with a bit of water and hit puree.
Follow these basic steps for tanning fur bearing pelts: Clean
the flesh side well, removing all the membrane. Apply the mashed
up animal brains (or substitute egg yokes and soap flakes) to
the flesh side. Keep the fur side dry, brain only the flesh side.
Wrap the pelt up in a plastic bag and let it soak in. After awhile,
(30 minutes or so) take out the pelt and start stretching the
skin. When it is completely dry, and hopefully soft, smoke the
flesh side. If the result is not as soft as you wish, then brain
and soften it again. Sometimes it takes that one extra step to
make something you can be proud of.
Look over the pelt tanning article for more detail or check out
www.braintan.com. I have tanned a fair amount of furs, but never
a squirrel.
Let me know how it turns out.
Good luck;
Bill Scherer
(Inquiry on where to purchase ti leaves for receipes.)
I live in Southern California. Can you help?
Hello;
A local source of ti leaves in your area are florist shops. Ti
leaves are also used for floral arrangements. Contact your local
florist and find out if they sell the GREEN ti leaves. There are
different hybrids of ti plants and the various colors are also
used in floral arrangements. You want the green ti leaves that
were traditionally used for cooking in Hawaii. Inform the florist
that you will be using the leaves for cooking purposes. You don't
want any chemicals sprayed onto the leaves that may get into your
food. Most of the ti leaves from the florist are food safe, but
just in case, inquire. Not all the florist carry this item, so
call around until you find one that sell ti leaves. Also prices
vary amongst the different florist. Find one that has the cheapest
price.
Another alternative is to contact ti leaf distributors in Hawaii. Do a search on the internet.
If you are only going to use just a few ti leaves, it might be best to contact your local florist as oppose to buying in bulk from ti leaf distributors.
Sincerely,
Dino Labiste
Greetings!
I found your email address on-line. We have been trying to bend
hickory with no success. We wondering if you may be able to provide
hints of success.
We built a nifty little steam box that generates a constant temp. of 200 degrees F. We have lenghts of hickory with the following dimensions: 6 foot long, 1.75 inches by 1.25 inches thick. We have tried steaming for both 2 hours and for 4 hours. Each time the stick broke.
Now, our wood is kiln dried but, we thought we might still be able to bend the wood.
1) Should we use green wood?
2) Should we soak the kiln dried wood and then attempt to steam
and bend?
3) How long should we steam for? Most literature says 1 hour per
inch of thickness. Is this squared inch of thickness? for our
6 foot and 1.75 X 1.25 inch thick....should we steam it for 2
or 4 hours?
4) Once bent, how long should we leave on the mold/frame?
5)Any other suggestions?
Thanks in advance for your assistance, suggestions, and expertise.
Hello Rodney, sorry to take so long,
but the holidays kept me busy. First, if your steamer is giving
temperatures of 200 degrees, it may not be hot enough. Since your
wood is quite dry, I would take a sample and try boiling it for
20 or 30 minutes and trying that. Tim Baker, one of the authors
of the Bowyers Bible had me do that with an Osage Orange stave
that was dry. Mine was a bit thinner, but it bent in 20 minutes
in boiling water. Otherwise it sounds like you've got the right
ideas - soaking first especially. The thickness is relative to
the time it takes the heat to penetrate, so refers to the thickest
area. (1.25 inches in your case). Experiment with scraps until
it works. As to how long to leave it in the mold, I wouldn't be
in a hurry to take it out. It needs to cool and dry out - and
that will depend on your climate. If you can wait a week, that
wouldn't hurt. Moisture will soften the wood and let it rebound.
If you have trouble with it returning to straight, you may want
to sinew cover the inside curves and/or waterproof the stave.
Good luck,
Norm
(Question pertaining to tanning a fox tail)
Hello Paul;
The answer to every question starts with "That depends".
I need a bit more information in order to answer your question.
Tell me about the fox tail. Is it dried, fresh, salted, or still
on the fox? Is it split open or still in a tube? Has the tail
bone been removed? Is it a Grey, Red, cross, or maybe a Artic
white fox? Have you done any tanning at all? For a first time
tanner, a fox tail is a very delicate project. Do you want to
learn the art of tanning, or do you just want a fox tail? I will
be happy to help as much as possible.
Bill Scherer
From: "Pond Scum" <pondscum@maine.rr.com>
Sorry about the lack of info I sent you before, I didn't realize you needed all the details about it. It's still on the fox in the cold of my garage. It's (the fox) been there for 1 day (it's Sunday as I type this). It's a Red fox, good size, and I want just the tail. I would like to save the tail for my wife to put in her car on the mirror, or if my daughter wins out, she wants the tail for her room. I have never done any tanning before, as for learning the art of tanning, I'm letting this experence happen before I decide if I want to do more of it. Oh . . . why am I bothering you about one fox tail? I saw your webpage and I liked the way you explained the WHOLE process of tanning a fox, and decided to take a chance that you'd be willing to explain to me what I needed to know to keep the tail.
Thank you very much!
Paul
Hello Paul;
I would like to recommend that you try to tan the entire fox pelt,
not just the tail. If you wish to have a tail to fly on the antenna,
those are available commercially from www.moscowhideandfur.com.
or Crazy Crow Traders for just a couple of dollars. A fox tail
is the most delicate part of the pelt, one mistake could ruin
the entire tail. I speak from the experience of ruining my first
attempt. However, if you are going to tan only the tail, get it
skinned and frozen immediately. Use a small slender blade, cut
from the inside to the outside, on the bottom side of the tail.
Keep it frozen until tanning time. Tanning should take place in
a warm environment, so you may wish to wait until spring, or work
inside a heated shed.
Remove all the membrane for the flesh side of the tail, be very
gentle here. I like to use something abrasive like pumice or sandpaper.
Then get an egg yoke and beat it. Apply the yoke to the flesh
side, put it into a bag, and let it soak in for an hour or two.
Take it out and begin to manipulate it until it dries out. Next
,you will have to come up with some sort of smoking scheme. I
like to sew the tail into the seam of an old pair of jeans, fur
on the outside, flesh on the inside. Start a small smoky fire,
add punky wood, and suspend you smoking rig over the fire until
the tail is smoked.
I hope this helps. Check out www.braintan.com. There is an very
good article there about fox tannig written by George Michard.
Bill Scherer
Hello Norm!
I just sent you a letter and photos but forgot to ask you something.
I've collected old crusty pitch from a driftwood log at a marsh
and have tried to use it to glue points onto arrows and a pump
drill, and as a soaproot brush handle. Whether I add nothing,
powdered charcoal or powdered egg shell, the resulting hardened
material (I don't let the pitch boil) is very brittle, which spells
disaster when these tools are used. The soaproot handle is fine,
however. I wonder:
1. Perhaps the pitch has been degraded by salt at the ocean.
2. I'm not adding the right amounts of the "temper"
(shell, charcoal).
3. I'm not adding the right type of temper.
4. Maybe you have experience/knowledge that can assist my endeavor!
I've also collected gooey, tarry asphaultum from a nearby creek--natural exudate from upstream. It is of the consistency of molasses. Is there a way to prepare it so that it hardens for use as a glue? It certainly doesn't come off my hands, so I'd like it to not come off my arrows, etc. but be dry and reasonably hard and elastic. Any ideas?
Storm
Storm,
As to your questions on pitch:
1. Salt water degrading? Maybe, I don't
have much experience with that.
2. Adding enough temper? I had the best results when I added enough
temper (ground charcoal and ground deer dung) so that the warmed
pitch was no longer sticky, then add just enough additional pitch
to get it sticky again.
3. The right kind of temper? Stuff that's a bit stringy seems
the best.
4. My experience? A bit limited, but I think Chuck Kritzon and
some of the others at PrimitiveWays will have input, I forwarded
your e-mail to all of them.
Asphaultum too gooey - - the only thing I can think to do is heating it slowly to drive off the lighter material. I've only used the commercial roofing tar myself as there isn't any natural stuff around here.
Norm
Hello Dick,
Quick question: How do you extract pine pitch from the tree. I've
seen pitch running out of wounds on some trees, but this is not
often. I would like to do some experimenting with pitch as a wet/damp
material firestarter. Will pine pitch stay in liquid form if you
store it in a plastic bag?
Thanks for any input!
Joe Musselwhite
Hello Joe,
I am sure that by now with your experience as an outdoor survival
student and teacher that in the woods you keep your eyes open
for things that "normal" people wouldn't know existed.
Ah! There's a bow stave. I'll bet that sapling would make a good
atlatl dart. That rock has a hollow which is perfect for a bow
drill socket. The list goes on and on. What I'm saying is tune
your looking in to pitch nodules on conifers. I have heard that
the natives where I live (San Francisco Bay region) would bash
the sides of pine and fir trees to induce the production of resin.
Resinous pieces of bark would be pulled off to use as torches.
Pitch, or resin, consists of a solid, nonvolatile component (rosin as used on a fiddle bow) and a volatile component (turpentine). Tarheels from North Carolina were involved in the production of pine tar and turpentine from pine resin. I'm not sure, but I think the turpentine component will probably slowly evaporate through a plastic bag.
Regards,
Dick
Do you have any info on knotless netting stitches & patterns?
Also any sources of waxed linen or other materials used? I'd really
appreciate the info!
Thanks,
CC
Hello;
Here are some references for knotless netting stitches and patterns:
1) SPT Bulletin of Primitive Technology
#17 - Spring 1999 - Fibers
"Looped String Bags" by Bonnie Montgomery, pages 19
- 22
(To order the magazine, access: http://www.primitive.org/backissues.htm).
2) "Androgynous Objects, String
Bags and Gender in central New Guinea" by Maureeen A. MacKenzie,
ISBN 90-5702-270-2
(The indigenous women of central New Guinea are master craftswomen
at weaving intricate bilums (knotless string bags). If you can
follow the drawings and explanations in the book, it's worth getting.
Buy the paperback book, it's a lot cheaper. I checked out the
book from the Stanford University library to peruse it before
I purchased the book. You can also order it through our website:
http://www.primitiveways.com/pt-books.html).
3) "Creative Ropecraft" by
Stuart Grainger, ISBN 1-57409-115-8
(Grainger has a section on various half hitches that can be incorporated
into string bag patterns. You can also order this book from our
website: http://www.primitiveways.com/pt-books2.html).
If you can't afford to buy any of the books mentioned above, your local library or the university/college libraries are good sources of information. If the books are available, the information is free.
As far as any sources of waxed linen
or other materials used, access: http://www.primitiveways.com/stores.html
Scroll down to "The Caning Shop". They have a website
and do mail orders. The Caning Shop sells various colors and sizes
of waxed linen and other type of strings and cordage.
Sincerely,
Dino Labiste
(Hide tanning thoughts from Bill Scherer)
Hello Sue;
I would love to share tanning ideas with you. Here are a few things
I have discovered in the last few years that you might be able
to use.
AIRFLOW: A big problem for tanning here in the midwest. We have fairly high humidity, and the hides dry quite slowly. I sometimes use a big window fan to aid moisture removal. This has the side benefit of keeping the tanner cool and blows away the mosquitoes!
WARMTH: The hood of my pickup truck in the sun. Put the hide on the (clean) hood to warm up the hide a bit. Work the hide by hand while on the hood.
PRESMOKE: After the initial braining and softening, smoke the pelt in the normal manner. Once it is presmoked, the second braining/softening goes a whole lot easier. The softening agent penetrates the skin easier and the softening goes much easier.
SOFTENING AGENTS: Since coming here (Minnesota), I no longer have access to pork brains via the Asian market called Ranch 99. So now I use egg yokes and grated up Ivory soap bars. Ivory soap has the big advantage of not attracting Yellow Jackets! It smells nicer than brains too, so Amy doesn't make disparaging remarks. And finally, it costs less than brains and stores without refrigeration.
AGE THE HIDE: This works well for leather, not furs. I found that deer hides that were aged for 1 to 2 years seem to take the softening agent better. I think this has sometime to do with the mucus in the hide breaking down over time.
LOTS OF & EXTREME PRESSURE HAND WRINGING, FOR LEATHER NOT FUR: I don't even bother trying to soften unless there are good bubbles being forced through the skin, from flesh side to hair side. I really reef on the wringing sticks, and force the brains to penetrate the skin.
DO THE HIDE IN STAGES: Once my equipment is in place, it is easier to go from hide to hide without changing gears. I usually flesh my pelts immediatly after skinning, and let them dry. Then I will dehair and scrape several hides during a 2 day weekend. Then during another weekend I will brain 2 to 4 hides on Friday evening, then refrigerate them until Saturday morning. Then they get softened during Saturday and Sunday. What I can't get to, will be frozen. Freezing is supposed to help penetration of the softening agents, but I have never noticed any difference. I like to do the smoking during the Fall season.
Well, those are my thoughts for the moment. I suppose tanning is my favorite primitive skill. Certainly the one I do the most of here in Minnesota. There is much better quality of furs, and I am not above picking up a nice looking roadkill!
During the July heat wave, I softened two deer leathers on one Saturday, and another the next morning. This is my personal best. If I had pushed it I could have done another Sunday afternoon. This happened when my family was in Europe, so no distractions for me. A lot of guys like to party when the wife is away, but I like to work on dead animal parts. I must be strange.
Bill Scherer
From: The Skinners
Hello, my name is Norman Skinner and I am kinda new to brain tanning.
I was wondering if you stretch and dry your pelts before you brain
them. I had always been told to do this and just wondered if it
was nescessary. And is it possible to soften two or more pelts
at the same time.
Thanks for any info you can give me.
Hello Norman;
I'm assuming you are interested in fur pelts, not leather, so
I will address this reply as such. There is a lot of variations
on how to tan fur pelts. Because I tan the pelts in stages (cleaning
one day, braining and stretching on another day, smoking on another,
ect.), it just works out well for me to dry them between stages.
Certainly you could brain the pelt right after cleaning. I always
stretch the pelt after the brain has soaked in for a few hours.
Don't try to stretch a pelt that is dried out, it must be in a
moist and limber state.
I am a single tasking kinda guy, so I like to concentrate on one
pelt at a time during the softening stage. A hide will have some
parts that dry out before the rest of it. This way I am sure to
discover any spots that must be worked harder. Try it for yourself
and see what works. Other stages of the process (cleaning, smoking)
are more suited for multiple pelts at a time.
Hope this helps,
Bill Scherer
From: The Skinners
Hi Bill;
Thanks for the info. I meant to email you right back but something
stole a couple of my skins that I was working on. I didn't feel
like doing much of anything afterwards. But I'm back on the ball
now. The Braintan.com Store has patterns for fur hats if you're
still looking.
If you don't mind, I have a couple more questions and then
I'll get out of your hair for a while. First, how important do
you feel it is to degrease a pelt before tanning. I've never degreased
one and didn't know if it would help the finished product any
or not. And also I tried using a PCV pipe for fleshing, but it
didn't work too good for the face. Is there a trick to that or
something. Also, what did you mean you mount it over a garden
rake ( I've always had trouble fleshing). I want to say that your
web page really kind of inspired me to start tanning again. No
matter what neighbors or family members might think.
Thanks alot,
Norman
Hello Norman;
I have been out of town for a few days, and just saw your email
today. Never a bother to chat about one of my favorite subjects.
Everybody seems to have problems with critters eating their pelts. Another advantage to dried pelts is they can be locked up. I keep the "in progress" pelts in a utility closet. I will check out the pattern info on the Braintan.com Store as well. Thanks a lot.
As far as degreasing goes, I think it makes it easer to remove the membrane layer (inner most layer of the hide) and helps with the penetration of the brains. I have never tried it without degreasing, but I will do some consulting of the literature.
I use a couple of different size PCV pipes. One of them has the end cut at an angle, so I can hook the critters nose on it. Even so, the face is a very difficult area to work. What you can't get out with the fleshing tool can be abraded out after the pelt has dried. I use the rake to hook under my fence, slide a 3 foot chunk of PCV over the rake handle, then a wooden brace to hold the rake handle up an angle, and then a second chunk of PCV. This second chuck is what I use for the actual beaming surface. The second chunk can be sized to match the work. Hope this makes sense.
I will be in touch,
Bill Scherer
Hi Norman,
Well, after talking to a few folks and reading some books, I can't
seem to find a real good reason why pelts are degreased. I think
it has to be removed in order for the brains to penetrate the
skin. I also found out that some folks use dishwashing soap to
remove the grease. The greasiest fur pelts I have done were racoon,
but even the weasels and coyotes had some grease on them.
Good luck,
Bill Scherer
"The Skinners" wrote:
Hey, talk about timing, I was just about to email you. I've been
talking to a fella at the hide out who rarely brains his coon
hides. He says they're so greasy, he simply works them soft and
lets the natural grease lubricate the hide. I don't think he really
gets them all that soft, but he says it's good enough for hats
and such. He said he thought degreasing was a waste of time. So,
who really knows. I think if it helps in the fleshing it would
be worth it.
I was also wondering how you attached your smoking skirt to the
bottom of the pelt. Some people have started glueing them on.
And do you cut it to the shape of the hide to get a better fit?
And also how do you smoke the tail? I've just been sticking a
stove pipe in the end of it.
Thanks,
Norm
P.S. I don't think that pattern from Braintan.com is what you're
looking for. The pattern doesn't have a cape on the back or a
face on it.
Hi Norman,
Got the hat pattern from Braintan.com last night. Its a Fess Parker
Daniel Boone type thing. Gives the instruction on how to add the
face, paws, and tail as options. Not quite what I was looking
for, but its all good information.
I have wondered if a hide could be tanned with its own fat. See if you can get your friend to document this sometime. Maybe get it on the web.
I use a combination of sewing and stapling on the skirt. Don't cut the pelt to get a better fit, just follow along the pelt bottom as best I can. Make the adjustments to the cloth, not the pelt. The tail is fitted down the split in the skirt (where the zipper used to be). Most people don't bother smoking the tail, and some will smoke the tail separately. I have seen the tail smoked by holding it over a hole in a deerskin that was being smoked.
Bill Scherer
I have been looking for web sites containing information on
pigweed which is mentioned many times in the Clan of the Cavebear
series. I have not been able to find a whole lot of information.
Could you point me in the right direction??
Thanks,
Amy
Hello Amy;
If my guess is correct, I believe the author of the "Clan
of the Cave Bear" series was referring to a plant with the
common name of amaranth (also known as pigweed or redroot). The
scientific name is Amaranthus retroflexus.
Amaranth is a coarse erect annual, reaching 1 to 3 feet tall.
Lower stems are often red or red-striped, with color continuing
down the taproot. The oval-shape leaves are alternately arranged
on the stems. Numerous small black, shiny seeds develop after
the flowers mature.
Edibility: The leaves and tender stems can be eaten raw or lightly
cooked. They are gathered in the spring. The seed can also be
used for food. The seeds can be ground and used as flour (or even
used whole). The seed consist of 15% protein as well as a host
of vitamins and minerals. Seeds are gathered in late summer or
autumn.
Medicinally: The leaves of this plant are a recognized astringent.
Amaranth is commonly found in cultivated lands, gardens, waste
areas and disturbed soils.
Check out the following websites for
more information on Amanrantus retroflexus:
http://www.ppws.vt.edu/~sforza/weeds/amare.html
http://www.fs.fed.us/database/feis/plants/forb/amaret/
Sincerely,
Dino Labiste
(Question pertaining to the article, "Primitive Quail Call")
What type of wood is used?
I used willow but any type will work.
How do you shape it?
With a knife. Although you could use a stone
tool.
What is the reed made of?
A rubber band but grass will work.
Bob Gillis
Rodney C. Haring
MSW Candidate 2002
School of Social Work
State University at Buffalo
Mr. Labiste;
I have enjoyed your website . . . thought provoking and much to
learn.
I have a question, while working a display project, that I would
appreciate any insight or thoughts you might have . . . how was
hide glue discovered, and what utensils/methods do you think were
used primitively to manuafacture it? Thank you.
Respectfully,
Mark Peatrowsky
Hello Mark;
Thank you for visiting our website.
As far as how hide glue or any organic glue was discovered, archeologists can only speculate as to how it was discovered. It might have been through accident that glue was created. Maybe after boiling a deer leg, along with the hoofs, in a hole in the ground lined with a deer hide, a sticky residue was left in the container. The glue-like liquid then solidified into a hard substance. Through trial and error, boiling hoofs, sinew and rawhide created hide glue.
The ancient Egyptians were known to utilize hide glue for adhering their furniture.
How did they create hide glue? Here is one idea. First a container for boiling the hoofs, sinew and rawhide was needed. A hole in the ground, lined with an animal hide could have been utilized. The water in the animal hide could be boiled by continuously adding and replacing hot rocks until the water began to boil. This process would have to keep the water continuously boiling until the glue-like substance, called collagen, was extracted out of the hoofs, sinew and rawhide. Collagen is a protein constituent of all animal hides. More water had to be added as it turned to steam. Normally, using conventional pots and a stove, it would take a total of 12 hours to boil the animal parts. After the boiling process had extracted out the collagen, the sticky liquid was poured into a strainer (either a woven mat or wooden strainer perferated with holes) and any remaining water was squeezed out of the sticky solution. The glue was then allowed to gel in the sun on a flat, wooden tray or a slight depression in a log. After the glue had gelled and then solidified, it was broken into bits and stored in a leather bag for future use. When needed, the glue crystals were dissolved in water and then applied. The container with the water and liquefied glue crytals could also be heated by placing the container on hot ashes to warm up the glue. If allowed to sit for a long time, the water would evaporate and the glue would again solidify. Warming it up keeps the glue in its liquid state.
Another container that could have been utilized for boiling the hoofs, sinew and rawhide was a soapstone bowl. Soapstone makes an ideal primitive boiling pot because it absorbs heat very fast and is easily carved into a bowl.
The California Native Americans used fish glue and a combination of fish glue and plant pitch for their adhesives. The fish skin most used was from sturgeon or salmon. One of the plant pitches utilized was from the various species of pine. Also asphaltum from the earth was used for adhesives. It was heated and used to haft obsidian and chert arrow points and knives.
I hope this information helps you answer your question.
Sincerely,
Dino Labiste
I'm working on a history of my family in Southern California,
specifically in Los Angeles. In 1839 my Great-grandfathers Francisco
Marquez and Isidro Reyes were given a Mexican land grant called
Rancho Boca de Santa Monica. In the description of the rancho
two plants are mentioned and used a landmarks. The first description
is as follows: "Beginning at a bluff, a sharp hill which
divides a cañada overgrown with "tule"
near the sea at a place known as Topango Point."
The other description is as follows: . . . a path leads down to
the cañada called de Iglesias, on a straight line with
a small red bluff of the same cañnada, at which path a
dead "mangle" was marked for a landmark.
Can you tell me what these plants looked like at that time? Do
they still grow in the undeveloped areas here in Southern California?
Your help with this matter will be very much appreciated.
Sincerely,
Ernest Marquez
Ernest, sounds like you have an interesting
family history. Tules (also called Tulares) are a bullrush - Scirpus
acutus or californicus. They are tall slender reeds up to 12 or
even 15 feet tall, which grow in fresh water. Tules are still
found around California, especially in flood control ditchs, and
around ponds in golf courses. You might want to check in with
local park rangers - Santa Monica Mountains maybe to locate some.
They were a common material used by the Indians for house roofs,
sleeping mats and boats (balsas). (I'm going to be cutting some
tomorrow morning). The reference to a dead mangle, I believe,
refers to an uprooted tree rather than to a particular species
- a log jam or snag. If it was big enough to act as a marker it
might have been cottonwood, alder, sycamore or oak. This would
not be a permanent feature, although they often last for quite
a while in the outside bend of a river. You might want to look
the word up in a big, old dictionary to be sure.
Good luck,
Norm
Antje Cobbett wrote:
Dear Bill,
Thank you so much for your tanning page! We also "suffer"
from a small back garden and it's really not easy to do the tanning
here. I'm breeding satin angora rabbits and white English angoras
and always have a backlog of orders for their pelts. In vain,
I've tried to find somebody here in
England, or indeed anywhere in Europe, to tan these furs professionally
for me, but so far I haven't found anybody. So I'm the lone rabbit
fur tanner of Europe!
At the moment I'm using alum and salt for tanning because the
country seems to be swept clean of brains from pigs, calve and
otherwise ... The other day I went to a local butcher and he at
least could give me 2 whole pig heads which I boiled diligently
in a very big pot and then I had to
split the head with an axe and a mallet. Gosh, such hard work
and what do you get? Tiny little pig brains! Oh, well, I will
take your suggestion and find an Asian Supermarket, maybe in London,
and see if they've got any. Can you believe that it is so difficult
to buy brains??? Hm, rabbit brains I do
have available, of course, but getting them out of the skull?
Well, must give it a try.
I like the flower pot smoking idea. I also have to be careful
with neighbours and space. My husband is just shaking his head
over some of my contraptions in the garden, but endures it with
stoic English upper lip. We live here in Kent, which is flint
stone country. They are just everywhere lying around. So I've
smashed a few on my patio to see if I can get a scraper for the
furs. After a few attempts I found one that lies good in the hand
and the other side is good for scraping and softening furs. Before
flint stone I used pumice stone, but often ended up with parchment!
Somewhere I also got a long jeans skirt with buttons down the
front, must find it again! Thanks for the tip, that is ideal!
I've made a tipi thing out of bamboo and use it with a chain to
hang a cauldron (can't find a real cauldron, so I use my stainless
steel pot) over a fire place. I thought it looks rather cute,
but husband and neighbours are just rolling their eyes up. So
now I can drape my wet jeans skirt over the bamboo tipi and smoke
furs, maybe even sausages? Lovely!
Thanks again for making the page!
Best wishes,
Antje
Hello Antje;
Thank you for visiting my webpage. If I ever start tanning rabbit
pelts, it would be angora rabbits. I have a few thoughts that
you might be able to use. With the lack of available brains (a
problem for many of us), there are a few substitutes. I have never
used any of these substitute methods, but I know several people
who have. The easiest one is slightly beaten eggs. An added benefit
is they smell less than brains, and there is less chance of infection.
Another "no brainer" is soy lecithin, available in health
food stores. To quote my friend Markus, "I buy the lecithin
in granule form at the health food store. Boil it up in hot water
until all granules are dissolved. Then I throw it in the blender
and make a very runny solution." Ken Wee in the SPT Bulletin
says to dissolve 1/4 Cup lecithin, 1/2 cup shortening, and 16
cups of hot water. Let the solution cool off so that you can hold
your hand in it without burning before applying to the pelt. If
the pelt is fresh off the rabbit, the flint scraper should work
fine. I have used obsidian scrapers, but mostly use a steel planner
blade.
If the hide is dry, I use pumice to remove the membrane. Just
be gentle on thin hides like rabbits and canine.
Your smoking skirt doesn't have to be wet, only damp enough to
keep the hot spots from burning. Don't want to steam your hide.
I would not use the skirt over the bamboo, since the bamboo would
be a real fire hazard. Try using the bamboo on the outside, sort
of an exo-skeleton. All you need is a few twigs going across the
inside of the skirt/pelt to channel the smoke into the pelt.
I visited Kent several years ago, and remember it a a beautiful
place. Lots of chalk laying in the fields. We met a couple who
were doing falconry at Leeds castle.
Let me know who it goes. One of these days I am going to try rabbit
pelts too. For the moment I have deer and Beaver to work on.
Best wishes,
Bill Scherer
From: Antje Cobbett
Dear Bill,
How lovely to hear from you and thank you so much for the tips.
I shall integrate them into my tanning efforts.
I like the idea of egg white, I've always wondered what to do
with them as I don't make cakes and sweet stuff and now there
is a way to use it up when I do mayonnaise! Great. But even more
I like the soy lecithin which we can also buy in health food shops.
The question is, how long do I have to leave them in egg white
(and is it a solution with water or pure?) and how long for soy
lecithin? I can hardly believe that this is tanning furs! But
I love it! It would be so much easier and less smelly, of course!
So far, I've tried tanning with oak bark, battery acid and alum,
all of which is very expensive and very difficult to get! So now
there is new hope!
Thank you so much again!!!
Best wishes,
Antje
Hello Antje,
Last night I took out my copy of "Buckskin: The Ancient Art
of Braintanning" by Tamara Wilder and Steven Edholm. They
were my first teachers of braintanning leather, so I refer to
them a lot. The section on alternatives say to use the egg yokes,
not the egg whites. I don't think water is added, but since I
have never tried this method I can't speak from experience. I
have read of an instance where sulfuric acid was used, but that
is a very toxic substance. I imagine the result would be a toxic
pelt as well. Stick with the natural tanning agents. I have also
heard of mayonnaise, soap, oils, tree bark, acorn paste being
used. Check out braintan.com, they have information on all this
kind of stuff.
On the question of how long to leave a fur pelt brained (or egged)
the answer is: "that depends". The thickness of the
skin and outside temperature are two big factors. After I apply
a brain paste to the flesh side of a fur bearing pelt, it is stuck
inside a plastic bag, and put in a shady spot. After an hour or
two I will smell check it. If it is getting too smelly, better
pull it out and start the softening. For a guess on rabbit pelts
on a warm day, probably two hours, but check every half hour.
I know the thicker pelts (raccoon) can be brained overnight. Hope
this helps. Give me a shout when you can.
Always my best,
Bill
Hi Dino,
Thanks for getting back . . . in one of my books by a Mayan anthropologist,
he mentions that cordage around 6,500 old from maguey was found
in El Riego de Tehuacan, Mexico. But I am curious if anything
earlier than that is known about.
You might like to know that I found out about Primitive Ways site
by reading a newspaper from France!
It might be really interesting to your group ( if they do not
already know a lot about it) to realize that a considerable amount
of cordage in Guatemala is made either made by leg spinning or
with the hand held rope spinning device called the "rueda"
or "carreta".
Thanks again,
Marilyn Anderson
I have been getting helpful suggestions. Many thanks to those who took the trouble to write me.
All this interest in subjects like "thigh or calf spinning" on the part of what seems to be a considerable group, I will convey to a Maya specialist in this area, JosÈ Balvino Camposeco, who is an anthropologist at the Subcentro de Artes y ArtesanÌas Populares in Guatemala City. He has done a little book ( El Maguey Y Sus Usos En Guatemala) (It may be available in English, too.) on cordage in Guatemala obtainable through the Yax Te' Foundation Press. in Palos Verdes, CA. email: pelnan@yaxte.org
It is hard for me to express how thrilling it was when I lived in a Maya town in Guatemala, in the 70s, to watch the boys who did this as "artes manuales" in school. During recent trips to Guatemala, I have been told that spinning maguey and making the "knotless" netting (simple looping) bags is no longer done in public schools there. It may be done now in some of the Maya bilingual schools.
Marilyn Anderson
Hello,
I came across your article when looking for some information on
drum making. Thank you for sharing your information with others!
I have started to work on a few tree trunks and tried using a
chain saw to open up the inside a bit so I could start using a
chisel. It is a bit difficult and do just a little every day.
So I would like to plan and make a few drums as you have showed
but would like to ask two questions:
1. How thick does the side of the tree trunk have to be to stay
stable and not crack in the future?
2. Do you have any recommendations as to where to purchase some
full pieces of rawhide (elk or buffalo)?
Thank you in advance,
Neta Aloni
Hello Neta;
> 1. How thick does the side of the tree trunk have to be to stay stable and not crack in the future?
If your tree trunk has been seasoned
properly, it should not crack. I have read of wood carvers using
green wood and roughly shaping the object to cut down on the drying
time. After the wood was roughed out, it was placed in a sealed
plastic bag for a week or more to stabilize the wood, then it
was taken out, worked on, and air dried in a shaded area. Of course,
these carvers have been working on wood for many years and they
were sensitive to all the tricks and short-cuts for curing wood.
Another fast method for curing wood was to rough out the form
and then grease the wood. It was air dried in the shade. This
technique was used by bow makers for their bow and arrows. But
letting it dry naturally for a few months (even to a year) is
one of the better ways to insure the wood will not crack in the
future. While drying, sealing the ends of the logs with Elmer's
Carpenter's Wood Glue will also help to keep the ends from cracking.
You can always give the wood a final lacquer or shellack finish
to protect the wood (don't do this if your wood is still green.
Let it dry completely before brushing on a finish).
How thick should the sides be? If the wood was properly cured,
you can make the sides from 1" to a little less than 1/2"
thick.
> 2. Do you have any recommendations as to where to purchase some full pieces of rawhide (elk or buffalo)?
Access our website (www.primitiveways.com) and find the category called "Resources". Then find the article entitled "Stores That Offer Raw Materials for Primitive Projects". Open the article and scroll down to Michael Foltmer. He sells deer, elk or buffalo rawhide. He is a reliable source and I would recommend him. He may be at an event in Arizona called Winter Count this week, so he may not be at his number. Call him to find out if he's around or try again next week. If you do contact him, mention you got his number from primitiveways.com and me. Primitiveways.com or I don't get any gratuities from him for mentioning his business to others, but it would be nice to know that we are referring him because of his excellent customer service and products.
Good luck on your drum project,
Dino Labiste
Hello.
John Goude gave me your email address. I'm looking into a
story about food foraging for Forbes magazine. As you might guess,
they're looking for something less on the survival side, and more
like a fun class outing, followed by a cookout. That kind of thing.
I found an outfit in Santa Cruz, CA that takes people foraging
in tidal pools and then cooks up a big feast, and now I'm trying
to find some other people/places around the country where this
sort of thing is possible. Any advice/contacts/websites I should
know about?
Thanks in advance for your help.
Dave
Greetings from Norm Kidder, Primitiveways:
You ask about food foraging classes around the country. I do about
on or two a year myself - once in March, a one day learn 'em,
pick 'em eat 'em sort of thing. and then we do a bit of foraging
as part of our Rattlesnake Rendezvous on Memorial Day weekend
along with a lot of other skills.
Good places to check in if you haven't already are John Kallas - Wild Food Adventures (Portland) wildfood@teleport.com, and Christopher Nyerges (Northern California) sos@self-reliance.net. Scooter Cheatam (Austin, TX) uwp@jumpnet.com , is putting together an encyclopedia of useable plants for Texas, and does Weed Feeds. David Holliday who works for BOSS (Boulder Outdoor Survival School) is an expert on the desert plant foods. (contact David Wescott at dwescot@aol.com) These guys are the best I know of, and the most likely to know others.
Happy hunting,
Norm
Do you know where I can get some antlers to make a knife handle?
Any ideas on how much it would cost? I spoke with a taxidermist.
He wanted $100 for a set. That's way too expensive for me. I'm
looking in the range of $20. Can I find some at that price?
I read your article on how to insert an antler onto a knife tang.
I have 3 knives that I'd like to make antler handles for, but
don't have any antlers. I know alot of folks who have antlers,
however, they're already mounted and don't want to part with them.
Thanks for any suggestions you have.
John Darwin
Hello John;
Access the homepage on our website: www.primitiveways.com
Look for the category called "Resources" on the left hand side of the homepage. In that category you will find the section entitled, Stores that Offer Raw Materials for Primitive Projects. Access that section and scroll down until you find Moscow Hides and Fur. Despite the name Moscow, this company is located in the United States. Check out their website (the URL address is in the information pertaining to Moscow Hides and Fur). They sell antler pieces that are reasonably priced.
Good luck on your project,
Dino Labiste
Mr. Baugh;
I have enjoyed your articles, and learned form them, on your website
and in the "Primitive Technology". I have a question
that I am trying to mentally bridge the gap with, perhaps you
know the answer or have some ideas. I would apprecitate it.
Aboriginals, early man, used hide glue . . . I've tried making this and knows it requires a long process of boiling, adding liquid, more boiling . . . till you end up with the goo. How do you think this may have been discovered? What primitive containers/methods would they have used? I have a project that I am working on demonstrating these things and am stuck on this . . . any ideas?
Thank you,
Respectfully,
Mark Peatrowsky
Hello Mike,
When was the last time you made soup from leftover animal parts?
My guess is that soup came before glue. Maybe someone was starving
and decided to boil up some dicarded feet, bones, hide, ect. to
extract some nourishment from them. Maybe stone boiling or in
a bark container held over a fire. They stuck a stick into the
mess and found out that boiled meat stock gels when it cools off
just like Jello. Pretty good glue can be made from un-flavored
Knox's gelatin.
Hope this gives you some ideas.
Dick
Hello GENTS!
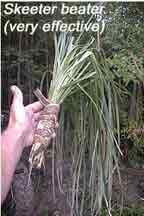 I found www.primitiveways.com/
and was happy to see that I am not the only guy in the world who
is looking at his world and values a bit on the primitive side.
My friends all think Im nuts lately, oh well, cant listen to them
forever I guess.........
I found www.primitiveways.com/
and was happy to see that I am not the only guy in the world who
is looking at his world and values a bit on the primitive side.
My friends all think Im nuts lately, oh well, cant listen to them
forever I guess.........
I am far away from your gatherings, (Mississippi) and would certainly love to see some hands on stuff.
But I have learned much on my own, just going slow and thinking about your surroundings, you can solve almost anything. (I design and maintain wildlife habitat specializing in watersheds. I contract to various govt and private habitat orgs).
I have decided to prepair for a 2002 winter pilgramage into the paleo world. Winter here isnt TOO harsh. I may decide to go elsewhere depending on habitat conditions. I want to do this for many reasons, one is that I must do this to feel and understand who I am and how I fit into things as I should. There are lessons here that can apply to a regular life, a whole system of values seems to be sitting here waiting to be explored and I want very much to feel this out and to see who the man is under the modern skin.
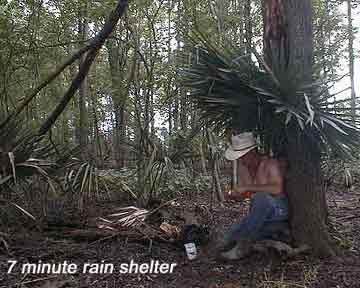 I have been far and wide in the
southeast all my life as pro salt fisherman, pro trapper, pro
hunter, I have done them all for a living and am only now beginning
to realize many things about myself.
I have been far and wide in the
southeast all my life as pro salt fisherman, pro trapper, pro
hunter, I have done them all for a living and am only now beginning
to realize many things about myself.
I can get all the pelts I need for clothes and bedding and other items and need to learn to tan them naturally. I also need to learn how to fire clay and how to find it in my region. I do know of one spot where indians gathered it, but I dont know how to use it. I have also purchased quite a bit of rock, good rock for points and knives and need to be instructed how to do these things.
Thats about all I need isnt it? :-)
Well some knowledge of local edibles would be real nice as well. Maybe something about making fire would be real good too.
I have to know this man ---- can you help me?
"Benny Marascalco" <yobenny@hotmail.com>
Hello Benny,
You need to join the Society of Primitive Technology (SPT). They send out a bulletin twice a year with tons of information. Steve Watts in Georgia is the presicent. The bulletin has lots and lots of names and addresses of kindred souls, organized by region. That would be the best way to connect with the people who could teach all thos things. I am sure that your hunting and fishing skills would be quite valuable to some of these people who know flint knapping, hide tanning, and other paleo skills.
SPT: call 208 359-2400. Well worth the effort and $.
Dick
Benny, greetings from the world of crazies
in California. Sounds like the lust for real life has gotten you.
Many of us dream about going abo/paleo but few of us do it. If
you haven't already, check out some other websites - abotech.com,
primitive.org, hollowtop.com, braintan.com, atlatl.com. these
will lead you to lots of others. There are a number of gatherings
in the Carolina/Georgia area. A good person to contact is Scott
(Abo-Boy-Wonder) Jones in Georgia. He is a flintknapper, soapstone,
gourd, river cane guru of sorts, and a fellow board member of
the Society of Primitive Technology. E-mail him at scottj@arches.uga.edu
(phone - 706-743-5144).
Good luck,
Norm
Dino;
I have some large pine logs in my backyard and am using them for
various projects. I'd like to make a double headed drum with one
of them. Would this be a decent wood for such a project? Also,
when pulling the rawhide, should I allow a slight even sag to
allow for the tightening of the skin once it dries? I really appreciate
any comments you can make to me.
Thanks!
Ursa
Hello Ursa;
The pine logs would work fine.
When lacing your rawhide, leave enough slack as you go around
your drumhead so that the hide is evenly centered on the opening
of the log. Before the rawhide dries, begin tightening the lacing
as you progress around the log. Don't wait for the rawhide to
dry to continue the lacing. You need to complete your lacing before
the drumhead dries. As you're tightening the lacing, you're stretching
the wet rawhide taunt against the log. The purpose is to stretch
out the hide as tight as possible. This will influence the sound
of your drum. You'll never be able to stretch out the hide if
your rawhide has completely dried first.
An added note: I mentioned to put a hole in the side of the log to enhance the sound of the drum in my website article. This is not really necessary if the drum sounds good to begin with. I've recently found that a two headed drum without a hole in the side of the log sounds just a good as one with a small hole in the side. Let your ears be the judge to determine whether to make a hole in the side of the drum.
Tip on lacing: Take a look at the coconut drum on the Homepage of PrimitiveWays.
Scroll down to the photo of the coconut drum. Instead of lacing your cordage through the rawhide holes in my two headed drum article, try securing the cordage on the drumhead similar to the photo of the coconut drum. Take a single cordage and weave it in and out through the holes in your rawhide. Secure the cordage with 2 overhand knots. Be sure that the knots end on the underside of the hide. Now, lace your lacing cordage through the cordage on the drumhead in the zig-zag pattern on the two headed drum article. The cordage that you initially wove through the drumhead and secured with 2 overhand knots will keep the holes in the wet rawhide from tearing. All the load will be taken up by the cordage on the drumhead and not on the rawhide holes.
Good luck on your project.
Sincerely,
Dino Labiste
Hi Dick,
Do you know of any effective natural insect repellants for on
the body or otherwise?
Thanks,
Eric Waymann
I have used garlic (chew a clove) and also mugwort (Artemesia sp.), a relative of sagebrush (rub it on). Mosquitos don't seem to fancy me anyway.
Dick
Hi Dino,
Do you know of any effective insect repellants for use on the
body or otherwise?
Thanks,
Eric Waymann
Hello Eric;
By "effective insect repellants", I'm assuming you're
referring to natural plants. I can think of 4 plants off the top
of my head:
1) California Bay Laurel - The dried
leaves can be scattered in shelters to repel fleas, lice and other
insects.
2) Eucalyptus - The leaves can be scattered in shelters to repel
insects.
3) Yarrow - The fresh leaves may be rubbed onto the skin as a
temporary but effective insect repellent.
4) Mugwort - Mugwort, as well as California Bay Laurel, leaves
were placed in acorn granaries by the California Native Americans
to deter insects.
Sincerely,
Dino
Bill;
Are the hides that you get, salted at all when you get them or
do you salt them? I hear of a lot of people soaking them in salt.
Is it neccesary when using the brain tanning method? If you have
answers, that would be helpful.
Thanks,
Jason Percell
Hello Jason;
Salt is not neccesary at all with brain tanning. If the hide has
been salted, the salt should be flushed out before scraping and
braining. The salt is added to the hide as a way to preserve it
until the tanning process begins. There are other ways to preserve
hides, freezing them for example or drying them. Fresh frozen
works the best for me, but I use the drying method more because
of limited freezer space. When using the drying method, I make
sure to scape all the meat and fat off the hide first (fleshing),
then let it dry. I think that during aboriginal times, salt was
a precious commodity, and not used to preserve hides very much.
Probably the hides were tanned as soon as the animal was butchered,
or at least fleshed and dried.
Bill Scherer
(Question pertaining to willow bark fibers)
Brant, sorry to be so long in answering,
but life is full. As to getting the fibers out of willow bark
- usually I use willow as is, sometimes separating the outer bark
and using the inner only. A quick way to get fiber is to strip
off some bark, then work off fibers from the inside bark along
one edge. I try to get them stripped off as long as possible,
which takes some practice. I continue working off fibers while
peeling back the outer bark. Another method is to dry the bark
and resoak it, then de-laminate it into ribbons by working it
loose (bending it back and forth). These thin strips can be further
separated until fine enough to twist into a stiff cord. This time
of year, it may be hard to get the bark to strip easily, look
for trees growing in the water, as they will be wetter, and easier
to strip). Keep practicing,
Norm
I just wrote to you and then discovered the primitive skills web site. I am very excited.
More questions:
Do you hold workshops for teachers? Day trip activities for kids?
(Or overnight - we are great campers) How are they structured
and what do they cost. (We are great campers and fundraisers,
but we are not wealthy)
We also have thought about planting gourds this spring to use next year. I have not before taught 4th grade and most of the teachers in my school are pretty pencil and paper, so I'm a little ignorant in this stuff. It seems that guords were used by Ohlones in several ways. Is that true - what ways? If that is so, I think we're going to try planting them before school is out and see if we can have some to dry for our Ohlone study.
And don't forget about the tule grass.
I am very interested in
*teacher workshops
*class field trips
*haveing a visitor come to the class
*materials, info about hands on things we can do when we study
Ohlone ways.
*stories from the Ohlones (I am also a storyteller)
If you can help me in any way, please respond. Thank you.
Bonnie Malouf
Greetings from Norm Kidder. You've got
quite a few questions, but all of them answerable. First you need
to know about the Coyote Hills Visitor Center in Fremont. They
have exhibits on the Ohlone Indians, including a boat made from
Tule reeds. They also have a shellmound (ancient village site)
within the park and do weekend programs to visit it as well as
weekday school field trips. Because you are from San Mateo County,
there is a charge of $40/hour/naturalist for your class. Call
Wanda Spitler, the secretary on Mondays, Tuesdays or Wednesday
mornings and ask her for information and an application form.
Applications for the fall are due by the first Monday in August.
In October they host the Gathering of Ohlonean People for a one
day event with songs, dances, stories and demonstrations, and
they have occasional other events. My wife works there (as did
I for 24 years). We are also offering a teacher training this
summer on the Ohlones, with special emphasis on hands on activities.
It is three days long and is listed under the Educators Academy.
You can sign up for it through our central registration office
at 510-636-1684. It's less than $100 I believe (I'm at home and
don't have the flyer with me). The date is near the end of July
- check the East Bay Parks website - ebparks.org - for specific
details.
Tules do grow around the Bay Area, but mostly in places where
you need permission to cut, such as drainage ditches and golf
courses. There are tules growing at Coyote Hills if you want to
see what they look like. You can tell them from the more common
cattails which have flat leaves and a cigar shaped seed head because
they have only a round flower stalk, no green leaves, and a tassel
like seed head. If you want to see what a thatched tule house
looks like, there is an exhibit at the county museum in Redwood
City (in the old courrthouse). I put the thatching on over a frame
that was already there. There is also a tule house at Coyote Hills
at the Shellmound, and there are models in the visitor center.
I also have a tule house at Sunol Regional Wilderness where I
work, but that is further to travel.
Stories from the Ohlone are scarce, but what exists have been
translated and illustrated by an Ohlone woman named Linda Yamane
or told by another Ohlone - Alex Ramirez. They are for sale at
the Coyote Hills Visitor Center store.
As to in class visits, there are some Ohlone people who sometimes
do that sort of thing, call Bev Ortiz at Coyote Hills - 510-795-9385
- to find out if any of her Interns (Ohlone people) are available.
Some phone numbers: East Bay Parks Reservations
- 510-636-1684
Coyote Hills Regional Park - 510-795-9385
Sunol Regional Wilderness (Norm) 925-862-2600
E-mails: chvisit@ebparks.org (Coyote
Hills)
svisit@ebparks.org (Sunol - Norm)
Websites: primitiveways.com
ebparks.org
Directions: Coyote Hills - take the Dumbarton Bridge to Fremont, take the first exit - Paseo Padre Parkway and turn left at the end of the ramp. follow to a left turn lane for Patterson Ranch Road (by a stand of Oak trees), turn left. Patterson Ranch Rd. ends in the Park. The Visitors Center is about a mile past the entrance Kiosk.
Sunol/Ohlone Regional Wilderness - take
I 680 north from San Jose over the Sunol grade from Fremont. Take
the Hwy 84/Calaveras Rd. exit and turn right at the end of the
ramp. Follow Calaveras Rd. south for 4 miles to Geary Rd. Turn
left and follwo Geary 1.6 miles into the park. The visitor center
and my office are to the left after the Kiosk.
Good luck, hope to see you in a program,
Norm
Bonnie, I forgot to mention gourds in
the earlier e-mail. they weren't used by the Ohlone until after
the Spanish arrived, the Ohlone's only crop grown from imported
seed was tobacco. Gourds grow best in very hot climates, I've
only gotten a few to be useable in my yard in Fremont. There is
a good place to buy them in Folsom - Zittel's Gourd Farm. they
have a Gourd Festival each year. For more info on that - e-mail
Chuck Kritzon at Petroglyphics.com (he's another of the PrimitiveWays.com
guys).
Norm
Hello Norm,
My name is Brant Assmus. Recently I have been trying to make cordage.
I have been trying to use the dry inner bark from birch trees.
Whenever I try to seperate these fibers they seem to fall apart.
Do you have any suggestions? Could you please tell me how to make
cordage from willow bark. Thanks.
From: Brant
Brant, I've never heard of anyone using
birch bark for cordage, but willow was (and is) used. First cut
some willow branches. Small green ones have very thin bark, but
try to scrape off the green outer bark. Thicker pieces can be
used, but only the inner bark, the inner bark works best if dried
first. After drying, resoak, then carefully separate into layers,
then shred into fibers. These should then be twisted into cordage
as with any other fiber. Willow inner bark cord is pretty stiff
when dry, but loosens up when wet. For tips on making cordage,
if you don't already know can be found on the primitiveways.com
website - look for the making cordage by hand article.
Good luck,
Norm
Brad Watanabe wrote:
Hey Mr. Labiste,
I got my coconut and I just scraped out the inside today. I didn't
really understand if I'm supposed to make a hole in the bottom
of the drum, or if I'm just supposed to leave it. I also was wondering
what I should use for the drum cover, because I don't think I
can find shark skin.
Thank you,
Brad
Hello Brad;
Since you already scrapped out the inside of the coconut, I'll
assume that you've already cut a hole in the coconut. The coconut
has three, small eyes. These are the eyes in which the plant sprout
will germinate from. I hope that you've cut off that top portion
of the coconut. That hole that you cut off will be the opening
in which the drumhead membrane will be lashed to. Do not cut another
hole on the bottom. Also your selection of your coconut should
be more round in shape as oppose to the elongated shapes. The
bottom of your coconut drum should have a slightly flat and rounded
shape. If you have the elongated shape, it will not lay flat on
the knee, when you play the coconut drum.
A Hawaiian fish, called Kala, was also
used for the drumhead. The fish has a leathery, dark green skin.
Check out the Chinese fish markets in downtown Honolulu. The markets
are located on the corner of King Street and the Ala Wai canal.
Ask the vendors if they have Kala. Or check out Tamashiro Market
in the Kalihi district (look in your phone book for the address
or call them up) to see if they have Kala. When you get the fish,
lay the Kala flat on a cutting board and cut around the body of
the fish. Near the gill area, gently peel off the skin. Try not
to tear the skin. You want a whole Kala skin to come off for your
drumhead. After peeling off the skin, lay it on the cutting board
with the flesh side facing you. Take a butter knife, hold it at
a 90 degree angle and scrape off any meat that is clinging to
the fish skin (remember: try not to tear the skin). Get off as
much of the meat as possible or the dry meat will eventually rot
the skin. You only want to be left with just the Kala skin. If
you haven't finish sanding and polishing your coconut yet, place
the Kala skin in a ziplock bag and store it in the freezer. When
you finish your cleaning, sanding and polishing of your coconut,
then defrost the Kala skin in cold (not warm) water. When it becomes
pliable, rinse it in soapy water, ring it out (remember: try not
to tear the skin) and lash it to your coconut.
If you don't want to go through all of that process with the Kala
skin, you can go with a non-Hawaiian method of using cow rawhide
for the drumhead. Go to a store that sells pet food and buy one
of those rawhide chew bones. These are hard, rawhide "bones"
that people get for their dogs to play and chew on. Soak the rawhide
chew bones in cold water until it softens completely (it may take
awhile). When it's soft, unroll the rawhide bones and you should
have a piece of rawhide for your drumhead.
Sincerely,
Dino Labiste
Mr. Baugh;
I've been studying primitive skills a number of years now for
my own enjoyment. I've read your articles in "Earth Skills:
A Book of Primitive Technology", and have been watching your
web site. I just wanted to send an e-mail and express my appreciation
for the research and knowledge you have passed along...it has
really helped me and excited me to try something new.
Thank you.
Respectfully,
Mark Peatrowsky
Fremont, NE
Thank you for your very kind words.
Dick
Hi Dick,
I'm wondering if you have suggestions for the following more "quick
need situations" where you have no ready made tools. How
to make a watertight container for travel such as something similar
to a canteen.
Mors Kochansky of Canada suggests carrying
a large rubber balloon and a nylon bag. They take up very little
space and weight and can carry a large volume of water. In the
"bush" you might find bamboo which can be hollowed out
as a water container. Other plants have hollow stems. AVOID WATER
HEMLOCK!!! Your stomach can hold a lot. Drink until you are on
the verge of puking, wait a while and drink some more until you
have to urinate. Meanwhile, your urine should be perfectly clear.
Some people are skilled at making watertight containers out of
birch bark. You have to be in paper birch country for that.
and also some type of container for boiling water in (presumably
with
rocks).
I have heard of Native Americans boiling
things in birch baskets held over a fire.
Also, any suggestions for how to tell the type of that won't
explode?
The magic words are "vesicular basalt".
This is an igneus rock with lots of holes in it. It's one thing
for people to suggest not to use stones from a stream but, how
to tell what you can actually use is another. Where we live, the
San Francisco Peninsula, the archaeologists look for "fire
cracked rock" as an indicator of old habitation sites. To
me "fire cracked" implys that the rocks were not all
ideal candidates for stone boiling. Experiment!
Thanks and cheers,
Eric Waymann
Hello Dino,
Your gourd canteens are truly a work of art. My question is, how
do you clean out the gourd from such a small hole when constructing
a canteen?
I've got a good selection of gourds and I make bowls and cups
with them. I would like to try my hand at a canteen. Could you
advise? Please.
What type of paint do you use on the gourds?
Thanks for any input!
Joe Musselwhite
Joe's Wilderness Survival Skills
Hello Joe;
> how do you clean out the gourd from such a small hole when constructing a canteen?
The traditional method I use for cleaning
out the gourd from a small hole is an old Hawaiian technique:
1. After the hole is made, take a stick and swirl it around the
inside of the gourd. This will loosen up any seeds and dried gourd
membrane. Turn the gourd upside down and shake out any loose seeds
and membrane. Some of the paper-like membrane will get stuck near
the hole. With a tweezer, pull out any obstruction at the entrance.
Repeat with the stick and extract as much as you can out of the
gourd.
2. When you can't get out anymore contents from the inside of
the gourd, the next step is to use pebbles to loosen up any clinging
seeds and membrane. Collect pebbles that will easily fit into
the hole. Your pebbles should also have facetted corners that
will help to abrade the inside of the gourd. Don't use smooth
stones. Drop your pebbles into the gourd and shake and swirl the
inside of the gourd. NOTE: Do not roughly bang the pebbles inside
the gourd. Doing so will create micro fractures in the gourd.
How hard should you shake it? It's a matter of feel. Experience
will tell you how hard to shake it. It also depends on how thick
your gourd is.
Occasionally empty out the contents of everything inside the gourd
and repeat the process until you start to get fine gourd dust.
3. After you are satisfied with your pebble progress, empty out
everything and fill the gourd completely with water. Let it sit
for 2 days, then empty out the gourd. Drop the pebbles back into
the gourd and fill it 1/4 with water. Swish and swirl the contents,
empty out everything and repeat over and over until the water
is clear. NOTE: Be sure you have a good grip on the gourd when
doing this. The weight of the water and the swirling motion may
make it difficult to hold. If you drop it, the gourd will surely
crack. The rule of "no banging of the pebbles from side to
side" still applies.
4. When you are satisfied with the results, empty out everything
and set the gourd outside in the sun to COMPLETELY dry.
5. To use the gourd as a water container, you have to leach out
the inside of the gourd (it has a very strong tannin taste). To
do this, it's just a matter of adding a solution of baking soda
and warm water to the gourd and letting it sit for a day. Empty
and repeat this process until the bitter taste is gone. The Hawaiians
used salt water from the ocean for the leaching process, then
fresh water.
6. When not using your water gourd, be sure to COMPLETELY dry
it out before storing. If there is any moisture in the gourd when
you store it, the inside will develop mold. It's also good to
coat the inside with safflower oil (you can use the brand called
Saffola - found at your local supermarkets). Or you can use olive
oil. Pour some oil into the gourd and swirl it around, then empty
out the oil. Turn the gourd upside down to completely drain out
the excess oil.
> What type of paint do you use on the gourds?
I don't use any paints on the gourd. The designs are burnt onto the outer surface using a wood burning tool (found at your local arts and crafts store or woodcraft store. Also check out The Caning Shop - www.caning.com). Since the gourds are porous, commercial paints may leach into the gourd. If you are going to paint your gourd, try using black, fine powdered charcoal from a campfire, mixed with pine pitch. It's more organic and less toxic. Let the paint mixture dry completely before using the gourd.
Sincerely,
Dino Labiste
(Question pertaining to the article, "Scout Pit")
In those pictures on this page it showed that you had the leaves with the branches and I thought that it would be very uncomfortable to have those branches for bedding. Also did you not have a blanket or did the leaves act as insulation? How do you make a grass mat? Is it like a woven mat? Sorry for all the questions I asked.
Your fellow outdoors man,
Nick
Hi Nick
Always good to know someone is reading the primitiveways website.
I'm always happy to answer any e-mails concerning primitive stuff.
The bedding is all leaves, with my GI issue rain poncho on top
of the leaves. The only branches are on top of the poncho, to
keep the wind from blowing the poncho away. I have slept in leaves
and hay, both are very comfortable. Did not use a blanket, although
I did wear pants, shirt, sox and coat. A knit wool cap is a good
idea too. If you got it, use it.
The mats I used were commercially made, the kind people use at
the beach. These were not really necessary, my idea was to limit
the amount of itchy leaves that would get inside my clothing.
I've tried with and without mats, seems to be about the same.
The only mat I've made was from tules (bulrushes). I will try
to describe the tule mat weaving process, but it should really
be a hands on demo. Lay down the tules in parallel like the rungs
on a ladder, but no space between the rungs. Take another tule
and wrap it around the tip of the bottom rung. Do the same in
the middle of the rung, and then on the other tip. Twist each
of the weavers, lay the next rung in, and repeat. Keep going until
your mat is as long as it need to be. Kinda confusing, I will
see if I can locate and better
mat weaving instructions.
Getting in and out of the pit is not difficult, but it is not
like crawling out of a sleeping bag. I suggest to bed, and keep
a canteen within arms reach.
Good luck and sleep well,
Bill Scherer
Dear Norm,
Picked up a reference to your work on the Wild Edibles listserv,
and wondered if you would like to be included in the Directory
of Edible Wild Plant Educators. It is a national listing of people
who are able to identify positively, at a minimum , the common
backyard weeds which are edible and medicinal, and who are willing
to help others identify them. The goal is to have someone within
50 miles of everyone in the US who they can turn to if they are
having trouble figuring out what "weeds" they have in
their backyard. Currently we have over 440 people from 45 states
included in the listing.
If you would like to be in, and/or have associates who also
belong in this list, please provide me with
Name
Address
phone number
e-mail
website
brief description of your background with edible wild plants and
what you are currently doing with them, such as teaching courses,
available for consulting, doing weed walks, etc.
Thanks
Peter A. Gail, Ph.D. Director, Goosefoot Acres Center for Resourceful
Living,
P.O. Box 18016, Cleveland OH 44118 (216) 932-2145, fax: (216)
932-2187,
e-mail: petergail@aol.com. Website: www.edibleweeds.com or
www.goosefootacres.com. Author, lecturer, photographer, publisher.
Books and
articles on edible wild plants, the northern Ohio Amish and creative
living.
Imprint: Goosefoot Acres Press. Classes on self-reliant skills.
Peter, greetings.
Thanks for the invitation. I just had an e-mail and in person
talk with someone you directed to me - Samantha Allyn.
For your directory:
Norm Kidder, Supervising Naturalist
Sunol Regional Wilderness
PO Box 82, Sunol, CA 94586
(925) 862-2600
svisit@ebparks.org or atlatl1@aol.com
see website - primitiveways.com
I teach a variety of skills under the heading of Old Ways Workshops for the East Bay Regional Park District. I do at least one edible and useful plant program each spring (current one on 3/24/01). I include ethnobotany on many other programs, including basketry, survival skills and on our weekend in the stone-age Rattlesnake Rendezvous on Memorial Day weekend. I teach primitive cooking as well. I an often available at work (park south of Pleasanton, CA) to help people with identification and uses. I have a small library of books available. Check out the primitiveways.com website for schedules of Old Ways Workshops.
Hope this is useful,
Norm
Hi Norm,
Do you have knowledge of a school similar to yours in the SW area?
I currently live in Tx, but could also attend a school located
within a reasonable driving distance (i.e., NM, AZ, CO). I have
searched the internet for such schools, but with no results. If
you do not have any info, perhaps you may be able to offer suggestions
for finding a school (contacts, etc.). Thank You for your assistance.
Warm Regards,
Wolf
Wolf, Have you checked out Tom Elpel's
website which includes a listing of schools? He is at hollowtop.com.
Cody Lundin teaches out of Prescott, Az, and there are others
in Arizona and Colorado. Check his list, which is state by state.
If you want more info on a particular school, you can check with
Tom, or me.
Good luck,
Norm
Wolf, Norm again. There is also Joe Bigley's book - Aboman's guide
to Primitive and wilderness Survival Schools (or something close
to that). Tom Elpel may sell it through his site if you can't
find it otherwise.
Norm
Hi Norm,
Peter Gail from my edibles newsgroup recommended I contact you.
My name is Samantha and I live in Danville. I am looking for some
classes or groups of people with whom to forage. I also would
like to learn more about what grows when - where - in this area.
Are you also a mycologist? I would like to learn about the mushrooms here. Are there any morels?
Sincerely,
Samantha Matlock
Samantha, it was good to talk to you
on Saturday. Again, the only edibles program I'm doing is on 3-24
at Sunol. some of the other Society of Primitive Technology members
do foraging outings on occasion, notatbly Bill Scherer, Dino Labiste
and Dick Baugh, they are all listed in the Friends of Primitive
Technology schedule on the PrimitiveWays.com website. I'm not
sure when they might be going informally, but you can e-mail them
and ask. The Rattlesnake Rendezvous has an opportunity for foraging
(May 25-27), and Dick Baugh's trip to Bridgeport also involves
foraging. The best book on local edibles is called The Flavors
of Home, put out by Heyday Books in Berkeley, it's available in
many bookstores. It's specifically on the SF Bay area. You might
also try the Botanic Garden in Tilden Park. The head guy is Steve
Edwards, who has some interest in Native American uses of plants,
they might have something on their lecture schedule. Point Reyes
Nat'l Park sponsors programs on California Indian subjects including
food preparation occasionally. The group that does them is called
MAPOM. If you call the Park, they can probably get you in touch
with the schedule. You're other option is to come by Sunol when
I'm there and drag me out of my office for help.
Good luck,
Norm
Mr. Baugh I am very excited that I found your web site! I am
a 22 year old college student in Sacramento California. I grew
up fascinated with primitive survival techniques, and the native
american way of life. I recieved Larry Dean Olson's survival book
when I was 7 and read it all the way through. I was hooked, always
trying to make tools, weapons, etc. anything I could. I think
in high school, society convinced me to be practical and logical
or something and I abandoned my boyhood passions because I had
to "think about my future." I have rediscovered my passion,
though I don't have alot of physical experience in primitive ways,
I think it is the only thing that really gets me going. Where
should I start? Are their any groups around Sacramento with these
interests. I thought I saw something about internships? Can you
make a career of this? Also I have been trying for a while to
make a bow drill fire, my big problem is cord slippage, I have
been using rawhide shoelace twisted until round, I grips fine
on the pull stroke but the push stroke slips some. Also how long
do you drill on average before you get a spark? Any response would
be greatly appreciated, I hope I didn't overwhelm you with questions,
I am just excited that there are others out there who share my
interests.
Thanks for your time,
Josh Eldridge
Josh's questions:
Careers in primitive technology: Contact Norm Kidder, supervising
naturalist in the East Bay Regional Park District. He's on our
web site.
Cord slippage on a bow drill: Do it the Egyptian way. Use an extra long cord. Either drill a hole through the spindle and thread the cord through the hole or else tie the cord to the middle of the spindle with a miller's knot. Then wind the cord up on the spindle. It CAN'T slip that way. Slippage is bad.
You should get smoke in a minute or less. I go real easy at first. I'm never in a hurry. After going easy fro a while and getting a wisp of smoke then go as fast as you can. Where you live get a California incense cedar hearth board and a spindle of something harder like willow or mule fat.
Regards,
Dick
Josh,
Careers in primitive technology are a bit rare. Most folk, like
Dick, do it as a hobby or side business. A few of us (myself,
Steve Watts - the president of the Society of Primitive Technology)
work for government entities that pay us for teaching primitive
skills as part of our jobs. We also due a lot of beaurocratic
stuff. Others are freelance skills teachers and craftsmen, such
as Jim Riggs, Ron Macy, Joe Dabill, etc. They make a slim living
with no benefits or retirement, but have some freedom. Some of
us run schools of one sort or another that include primitive skills.
Larry Dean Olson started Boulder Outdoor Survival School, which
includes primitive stuff in a survival setting. Dave Wescott,
who runs the Rabbitstick Rendezvous and publishes the Bulletin
of primitive Technology, took over BOSS from Larry, and in turn
sold it. Cody Lundin worked for BOSS, and now has his own school,
the Aboriginal Living Skills School. Tom Elpel runs the Hollowtop
Outdoor Primitive School (which may take in interns) . There are
many others out there. Tom's website www.hollowtop.com has a list
of schools all over the country. The one other school I've heard
takes interns is the Teaching Drum school run by Tamarack Song.
My recommendation would be to check out Tom Elpel, and BOSS (i
think there is a link to BOSS at Hollowtops site). Boss does hire
folk who have been trained to do the skills. Take a few BOSS courses
if you can afford them, go the the Rabbtstick Rendezvous in Idaho
in September (e-mail dwescot@aol.com). Take classes from anybody
else you can find (check with Chuck Kritzon at petroglyphics.com).
Join the Society of Primitive technology (a bargain at $25), and
come on our Rattlesnake Rendezvous on Memorial Day weekend if
you can.
Keep in touch,
Norm
Hi Norm,
I'm interested in becoming an outdoor guide and I'm looking to
start my training by learning primative living (primitive fire
building, prim. fishing, prim. hunting, shelter building, tools,
etc). I'm wondering if you offer training (or know of a good source
that does). Many of the wilderness training organizations only
focus on wilderness survival but I feel like wilderness living
is more suitable for what I'm looking for.
Thanks for your help,
Elliot
Elliot, greetings from cyberspace. What
kinds of training are available to you depends on where you live.
If you are near the San Francisco Bay area, then we offer some
classes that would be useful to you. Check our website: Primitiveways.com.
To find other schools around the country, Tom Elpel has a website
that lists most of the schools at hollowtop.com. Joe Bigley also
has a book out called Aboman's Guide to Wilderness Schools (or
something like that). Joe's school is listed with Tom's site,
and he also runs a chat room called the `cave' on the abotech.com
website. Tom has taken on interns in the past and so do some others.
Good luck,
Norm
Hello, my name is Alan Skopinski. First I would like to say thanks for all the help you have given so many others, and many wonderful articles. I am currently studying ethnobotany and primitive living skills, more or less focusing on primitive living skills. To be honest, I was hoping that you take apprentices or interns.... I have learned a great deal in the past few years taking on interns, notably with Tom Elpel, and quite hopefully with Tamarack Song. If this is a possibility I would love to recieve more information. If not, thanks again and again... keep up the good work.
All that will be,
Alan
Alan, thanks for the e-mail. I work for
a local government agency rather that for myself as do Tom and
Tamarack. The only intern program we have is for college students,
and I have to submit a description, and our Human Resources Dept.
picks the person, so I don't know if I'll get one this year. I
do work with young folks on an occassional basis who take jobs
with the East Bay Regional Park district (my boss) as part time
student aides and summer recreation leaders. For any of these.
you'll have to contact the HR people at ebparks.org or call 510-635-0138.
Good luck,
Norm
Bill;
I live in a area of Utah that allows me access to many fox and
raccoon. My family has been into raising chickens for many years
and that seems to be a great attraction for these pesky critters.
For the past 10-12 years, we have used all different types of
trapping methods and have become skilled in the art of capturing
coons, foxes, and skunks. We have been simply donating the corpses
to mother nature. My question is, is there a market for these
skins? It seems so wasteful to just throw them away. I look forward
to your feed back.
Regards,
Chad Brady
Chad;
I grew up on a farm, so I am well aware of the farmers need for
pedator control. There is indeed a commercial market for raw furs.
However the condition of the furs is critical. Fur is only in
"prime" condition for a few months, sometime weeks,
of each year. Unless the animal is trapped during that time, and
properly skinned and cleaned, a comercial dealer will not want
it. I will contact my brother in Minnesota, he is a trapper and
can give us more information. There is a Utah Trappers Association,
contact them for information.
There are other uses for animal carcasses than just pelts. I have eaten raccoon, quite tasty. The teeth can be used for jewerly. My friend uses fox leg bones to make flutes and whistles. Let's see what other uses we can come up with for the critters. I will contact you as soon as I have additional information
Bill Scherer
Hi, my name is Alan . I just wanted to tell you that your article
on the atlatl was great, and much appreciated. I hear that you
teach children primitive skills... do you have a school? To be
honest, I was hoping that you take on apprentices. If this is
so, I would love to get some more information. I am currently
studying botany and ethnbotany, some mycology, primitive living
skills (poor title), and some anthropology. The reason I wish
to delve into an apprentice setup is because I plan on putting
together some studies of my own, mostly relating to ethnobotany
and primitive skills, but including ethnobotany and primitive
skills teachers. I wish I could tell you more but I am still writing
this, and I imagine you know how it feels.
Reguardless of outcome, your article was a pleasure and I hope
you keep it up. By the way, I found that cherry wood works well
for a didj 5ft and under, 1 1/2in mouth piece fanning out to a
3in bell at the bottom. Any longer and the reverberation goes
to white noise. Maybe you have had a similar problem. Any ideas?
All that will be,
Alan
Hello Alan,
I am strictly an amateur at teaching young people. I do volunteer
work in the schools here on the San Francisco Peninsula. You should
really join the Society for Primitive Technology. That is the
best group for networking primitive skills. In the San Francisco
Bay area we have FPT, the Friends of Primitive Technology, a pretty
active group.
The most successful didj's I have made have been from small eucalyptus logs. After they have dried I quarter them with a bandsaw, cut out the interior with a router and glue the staves back together. I use a piece of innertube rubber to hold it tigether while the glue dries. Then seal the inside with low viscosity epoxy.
I'm off tomorrow morning to the Winter Count primitive skills rendezvous in Arizona.
Keep in touch,
Dick
I just found your website and have enjoyed it. My interest
in Native American culture started as a young boy growing up near
the Senecas in southwestern New York state, and continued as I
pursued a career as a forester after graduating from the New York
State College of Forestry. Until I retired, my work was mostly
in Georgia and the southeast. Since my retirement I have been
active in the Georgia Native Plant Society having served on its
Board and as President. I am interested in the subject of knotless
netting and have made some "sprang" hammocks. Can you
help me with some references?
Cordially,
Jim Smith
Hello Jim;
Here are some references for knotless netting:
1) SPT Bulletin of Primitive Technology
#17 - Spring 1999 - Fibers
"Looped String Bags" by Bonnie Montgomery, pages 19
- 22
2) "Androgynous Objects, String
Bags and Gender in central New Guinea" by Maureeen A. MacKenzie,
ISBN 90-5702-270-2
3) "Creative Ropecraft" by Stuart Grainger, ISBN 1-57409-115-8
Hope this helps,
Dino Labiste
Hello,
I am a varsity scout leader for a group of 8 boys. I have been
looking for a project that would both teach and inspire the boys....your
4 hour kayak just may do the trick. There are just a few questions
I have regarding the supplies I will need.
I live in the Pacific Northest (Medford, Oregon) and wonder where I would find the willow needed to build the kayak. As you might tell, I know nothing about plants and trees but am willing to learn!
See : http://www.gripclips.com/primitiveways/plants3.html/pages/Willow.htm
Secondly, is there a season to obtain this willow.
No.
and do yo need to soak,
No, but you should finish the boat before
the willow dries out as it will get stiff and be hard to bend.
then dry before covering?
No, since it is the shape of the frame that
gives it strength.
I like the 4 hour kayak because it is inexpensive and fun. Should you have other unique items to build I would be very interested.
Take a look at our http://www.primitiveways.com/
Site. Lots of fun to be made.
Bob Gillis
Let me know what you think.
Sincerely,
Rob
Bob,
Saw the piece on reed flutes at primitiveways.com. Was wondering
how can you keep the holes you drill in the flute from splitting.
If the reed is seasoned there is no need
to reinforce the holes. I used a knife to cut the holes. If you
use a drill bit make sure it is sharp and drill the holes slow.
You can also burn the holes with a large nail that hold in a vise
grip and heat red hot with fire or propane torch.
The picture seems to show some type of reinforcement added around
the circumference of each hole, what is this material?
You are seeing the edge of the holes (since
the holes were knife cut).
Bob Gillis
Thanks in advance for your reply,
Lance Stewart
Primitiveways;
I represent the National Paleolithic Society, Inc. We are about
to embark on a national membership drive via the web. I can't
tell you how much I enjoyed my visit to your site. I would realy
like to speak to you about reprinting some of your stuff. Would
you please send me a phone number at which you can be reached
or give me a call on our toll free line at (888) 828-6188. You
can check us out at http://www.natlpaleo.org. There isn't much
in the way of content out there yet, but there is enough information
to at least give you an idea what we are about. I think our "articles"
link will be of particular interest to you.
Hope to hear from you soon,
Ken Jensen
hi norm!
i met you a couple years ago when i visited coyote hills state
park when i was working as a naturalist (still am). you and your
wife were facilitating a program for 3rd graders--fire by friction
and a visit to the Midden. i'm looking for on-line and hard-copy
info regarding obsidian knapping. i've made a few points with
pieces i've found in the local creeks up here in Loma Mar (inland
from Pescadero, next to La Honda), but i end up "wasting"
a lot more rock than i want to. i'm especially interested in learning
how to first strike the obsidian in order to split off a great
piece to work with (rather than the hit-it-with-a-hammer-and-see-what-i-end-up-with
method). so far i've only worked smaller pieces of obsidian with
deer antler point via the pressure-flaking method, but now i've
found a few large pieces (maybe a third of a loaf of bread in
size) and don't know where to start. any suggestions?
i also wonder about cordage-making techniques. i've been experimenting with different materials: bracken and sword fern inner-stem fibers are wondrously elastic and relatively uniform in width; wild cucumber outer skin fibers are decent; and recently i made 32 feet of iris cordage. Here's my quandry--i took that 32 feet of cordage and, after folding that length in half, i proceeded to twist those "two" lengths into rope yet again. basically i z-plied the iris twice onto itself--does this make sense? i'll eventually send a photo. the problem--as i proceeded to do this, my second round of ply-ing worked against the original ply, causing it to begin to unwind. i worked hard to re-wind the original ply as i went along and everything was okay at the end, but too much work considering that there must be a better way! thank you!
storm
Storm, thanks for the note. My failing memory tells me you are one of the staff from the school camp along with Osprey, the Husk, et al.? As to the knapping question, there are books and articles out there, but I'll refer you to Dick Baugh for the best info on this subject. There is a group that meets Tuesday nights in the San Jose Area to knap - Dick can connect you to them as well as suggest the best books, etc.
As to the cordage question - did you
twist and ply the same direction on the second round as on the
first? To make it work right, when you double back the cordage
you reverse direction, so if you z twisted and s plied, you would
s twist and z ply on the second round, then if you do a third
round you go back to the z twist, s ply and so on, reversing each
time.
Hope this is what you need.
Good luck,
Norm
Bill;
I have just gotten my first gray fox and am trying to tan the
hide myself. I read your article after I got it skinned out and
frozen in the freezer. I split the hide as I have done with deer
and bear except for the tail and the neck up. Should I just go
ahead and split the rest? After reading the article I have a couple
of questions:
1. Do I mix anything with the brain and for how long does it cook
when cooking it down?
2. Do I degreass before I flesh or after?
That should get me started for now. I will probably write with more questions as I get farther into it. Thanks in advance for your help.
Steven
Hello Steven;
I will do my best to answer you questions:
1. Just add a bit of water, maybe about 1 half cup of water per
cow brain. What you are looking for is a milkshake type of consistency
to the mashed up brains. So if you are using the fox brain, a
tablespoon of water should do. Let me know what you come up with.
Extra runny won't hurt, you could cook the brain until it gets
to a consistancy you like. Cooking the brain at a slow boil only
has to be for a few minutes, but more would not hurt. Cooking
the brain is not really neccessary to
braintan, but it is a good safety measure to prevent infection.
You may wish to wear rubber gloves, at the very least make sure
you have no cuts or bruises on your hands.
2. Degrease the pelt after fleshing. Fleshing should get out 99.9%
of the meat and fat. Degreasing is to remove the slimy grease
that remains on the pelt after it has been fleshed.
You may want to split the tail now too. To braintan any hide requires getting your fingers on all areas of it, and that includes the tail. Be very gentle while working the fox, they are thin skinned and can easily be ripped.
Good luck and keep in touch.
Bill Scherer
|
|
Questions |
and Tools |
|
We hope the information on the PrimitiveWays website is both instructional and enjoyable. Understand that no warranty or guarantee is included. We expect adults to act responsibly and children to be supervised by a responsible adult. If you use the information on this site to create your own projects or if you try techniques described on PrimitiveWays, behave in accordance with applicable laws, and think about the sustainability of natural resources. Using tools or techniques described on PrimitiveWays can be dangerous with exposure to heavy, sharp or pointed objects, fire, stone tools and hazards present in outdoor settings. Without proper care and caution, or if done incorrectly, there is a risk of property damage, personal injury or even death. So, be advised: Anyone using any information provided on the PrimitiveWays website assumes responsibility for using proper care and caution to protect property, the life, health and safety of himself or herself and all others. He or she expressly assumes all risk of harm or damage to all persons or property proximately caused by the use of this information.
© PrimitiveWays 2015