Wood is in my opinion the most versatile material on the planet. Depending on the species, it is flexible, strong and reasonably hard, but still quite easy to work.
There are three rules which will make woodworking with Stone Age tools easier:
– Do the bulk of the wood working while it is still green.
– Use materials of the shape and size you need. Searching for better materials is often better than chopping away at something which looks totally different from the final product. Naturally broken and split trees as well beaver sticks are noteworthy examples of excellent sources.
– Use as small diameter trees as possible. The reduction strategy should be chosen depending on the need for speed and accuracy. On expedient items such as wedges, speed is the most important, while when making finely tuned equipment such as bows and arrows you will also need a great deal of accuracy. Of course, when making a bow, sanding the blank down from a whole log will be a major undertaking to say the least. Because of that you use one of the speedy strategies first and then switch to less risky, more accurate ones as you get closer to the finished dimensions. In time, gaining experience in “reading” the wood and in tool use you will be able to successfully use the quickest methods almost all the way.
Here are the primary strategies used for working wood, numbered from the quickest and least accurate to the opposite end of the scale:
1. Splitting
2. Chopping
3. Sawing
4. Carving
5. Scraping and planing
6. Grinding
Drilling is a fairly unrelated technique that will be treated on it's own.
Splitting
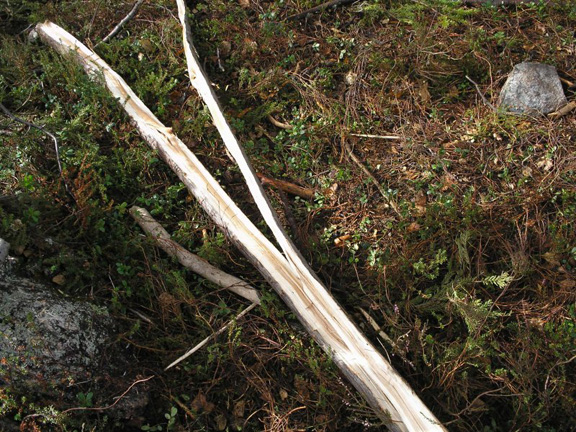
Splitting is generally the fastest means of removing wood and as you become skilled in controlling the break, it will help you do things almost as quickly as if you were using steel tools. When some major splitting work is to be done on a piece make sure the grain is as straight as possible (if straight is what you want). This can to a certain degree be determined by the bark and the alignment of the branches by looking up the branch. If straight wood is what you are looking for they should align almost perfectly up the trunk, without any spiralling. Splitting a small to medium sized tree or sapling, can be achieved by scoring or breaking halfway into the piece and then tearing the split to align with the pith in centre. The split is controlled at any given time by exerting force on the side which the crack wants to run off into. Be gentle, too much pressure will cause it to go too far back over to the other side. This way you can guide it all the way to the end. This is the way to do it, if you use wedges or not. On bigger pieces use a tree fork for more leverage. Some woods split easier and are easier to guide than others. For instance: Young willow can be difficult, while ash generally is easy to split and guide.
Here the split is seriously off to the right, add loads of pressure to the left side to get it back into the middle. Use a fork in a tree for leverage.
Wedges offer a means of breaking through a smooth surface and into the fibre creating a crack. In addition they function by pushing aside the fibres enlarging the crack further. For the first function you need a wedge of a hard material; stone, bone or antler. I prefer antler as the other two doesn't tolerate sideways torque as well. To save on the hard wedges, switch to wooden ones after the initial crack has been made. They don't cut as well, but if made of hard wood they will split the wood at least equally well. If it binds on a knot or the grain interlocks, use a sharp, flat antler wedge to cut through at the problem spot rather than risk breaking the entire piece by forcing it. I prefer my antler wedges to be flat, but they are impossible to make without quite large, high quality antler. Tines are a good second.
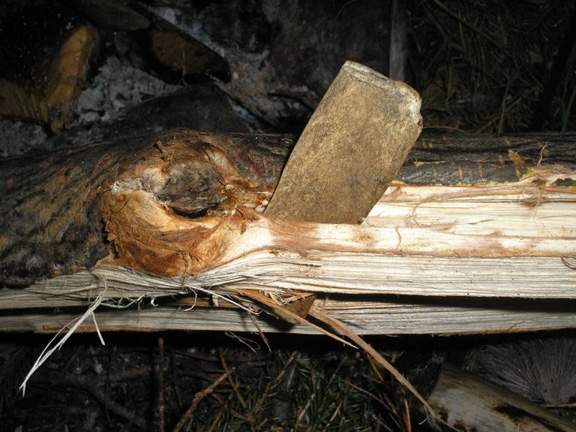
My favourite antler wedge in action, flat type.
When splitting from the end (you can also start from the side in the middle or wherever) you should first pound in a line going from one side to the other. Another important principle of splitting is to always split down the middle, if there is no obvious middle you are well advised to carve down to a symmetrical cross-section for a more reliable result. Pound a hard wedge into the middle of the crack, that should start the crack evenly from one side to the other. Pound in wooden wedges from both sides and keep the crack running down until it is possible to continue as described above. On large or short logs, you need to use wedges all the way.
Some species of wood are hard to find small pieces of which are reasonably straight grained and knot free. A particulary noteworthy example of this is juniper. Chopping down a whole big tree is neither ecological or energy saving. Choose a standing tree that is visibly straight grained and preferably has a protruding section which can easily be isolated. This is a feature commonly found in big juniper. Juniper is also exceptionally easy to split, which is also an advantage with this method.
Saw or carve a notch in the upper and lower end of the chosen piece which is as deep as the desired piece to be split out. Punch thin, hard wedges into the side in one end from both sides. When there is a crack, punch in wooden wedges, pull out the hard wedges and punch them in a little further down. That procedure is is continued until you reach the other end.
Chopping
When you have a large sharp piece of stone (or hafted antler, ivory or bone) you can use it for chopping off material. It usually doesn't need to be hafted, though that definitively will cut down on the effort needed when cutting trees or there are large tasks at hand. Chopping works when the sharp edge concentrates force in such a limited area that the fibres of the wood are torn in half. The wedge like shape behind the sharp edge works further to split away the smallest of the the halves, usually just a splinter.
Chopping is simple, faster than carving and usually more precise than splitting on it's own. When chopping down a tree or cutting a piece in two lengths you need to make a fairly wide chopping notch. More experienced workers can use narrower notches. The key to continue deepening the notch and finally breaking the piece off is to always attack a ridge and not a smooth edge, where the axe (or whatever) probably will just glance off. As long as you believe the break will be predictable and not split the tree, it is usually the most energy saving approach to break it by bending or hitting at the earliest point possible.
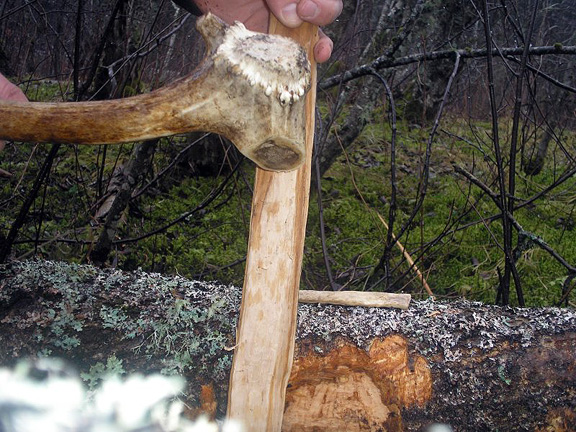
Hewing a piece of bird cherry. Notice the supporting log behind.
When chopping along the grain instead of across, with the goal of thinning a piece, you need a far sharper than that required when cutting across the grain as described above. Greater sharpness, a thinner blade and less weight will give you greater control. As mentioned, part of the function of the chopper is wedging the fibres apart. Because of this care must be taken to not make unwanted splits. Turn the piece accordingly and chop across the grain instead of along it. That is generally more reliable.
A good reduction strategy when following a line closely involves chopping notches close down to the line in short intervals and then split off the sections. If the grain is wavy you need to chop at close intervals. The finished result is an irregular edge, which can be smoothed down by further chopping and carving.
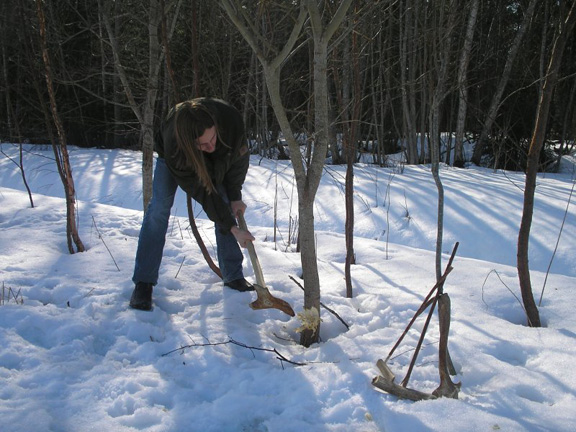
Me chopping down a goat willow.
Sawing
Notches in green wood, and especially seasoned wood are usually made by sawing. The stone saw invents itself from a flake by automatically becoming serrated when you start sawing with it. When you sharpen it you can either sharpen it either from one side or both sides. The former will be excellent for evening an irregular break, while the other can be used more like a regular saw. Most flakes will however be wedge like in shape and get stuck after sawing a little down into the wood. Of this reason you will need to either have to bend the wood or saw down several times in a notch like fashion.
Demonstrating the principle of sawing.
Big, sharp rocks can often be used as an “abrasion saw” where you move the wood instead of the saw. Such an sharp edge is often easier to use than making a flint saw and is adequate, if you don't need all that much accuracy.
With all saws, it is easier to use them if their edges are somewhat long. That will allow you to do fewer passes, put more force into the sawing motion and the dulling of the edge will go slower (since there is more edge to spend).
Carving
Carving is the most flint (or sharp stone in general) consuming technique there is. Stone dulls extremely fast this way. In a stone poor environment, like my neck of woods, you want to do as little of it as possible to conserve stone. It is a lovely technique however, and when you really need it you can always reuse the flakes as saws later.
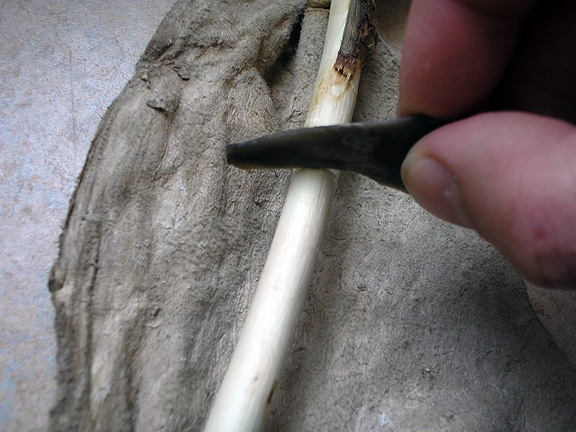
Instead of using stone for carving, beaver teeth makes an excellent substitute. They are especially useful when cleaning up sawed notches and carving deep shapes. To my knowledge, boar tusks and porcupine teeth work in the same fashion, although I have never had the opportunity to test them personally.
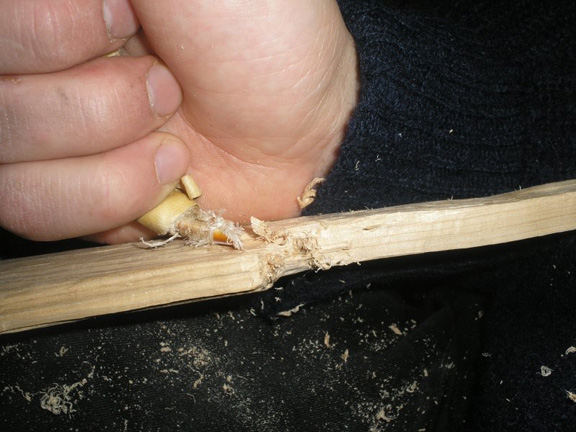
Carving with a beaver tooth knife.
Stone doesn't tolerate sideways torque as well as metal. When carving with a flake you need to take care to only put gentle pressure on it. Support it from the top and carve in a by a pushing and sliding motion. Beaver teeth handles torque slightly better and are self sharpening, but their short edge doesn't make them well suited for large tasks. They also seem to handle dry wood somewhat poorer than stone.
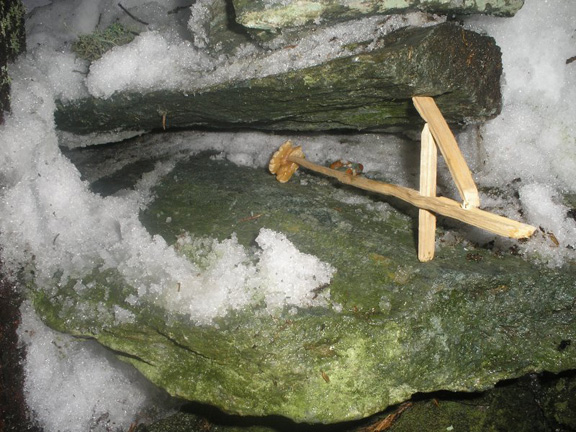
Making such a set of trap triggers can be a good exercise in using stone tools.
Scraping and Planing
Both scraping and planing is essentially the same type of task so I'll treat them together. It involves using a flake to remove material by pushing or pulling on a surface of wood, usually in the direction of the grain. The amounts of materials that can be removed this way in each stroke are not great, but since it's easily repeated it is faster than it may initially seem to be, especially on narrow ridges. An arrow to be reduced in size, being round it is essentially all ridge. Which lends this method extremely effective.
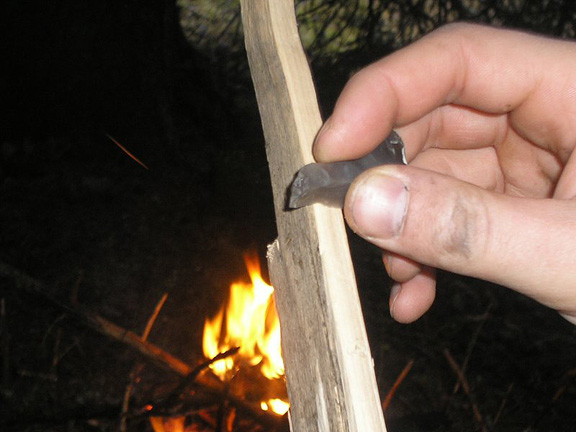
Scraping with a piece of flint.
This process is very straight forward. What can happen is that applying too much pressure to a surface can make it jump along the surface. This tendency will be self-reinforcing and looks like a washing board. To remove them, scrape/plane in a different direction than was originally done, or you can abrade them away on a stone.
Grinding
Abrasion is by far the slowest way of removing material. To get a smooth finish on something it is however usually an essential step. Also, to achieve a truly flat surface, grinding on a flat rock is the most reliable method. What grade of rock you use depends on how much you are going to grind. On very coarse rock you can abrade quite quickly, which is an advantage in an environment with little knappable rock. I often use this method on things I make in a hurry when out and about. Conversely, for a polish, you as fine a material as you can get your hands on.
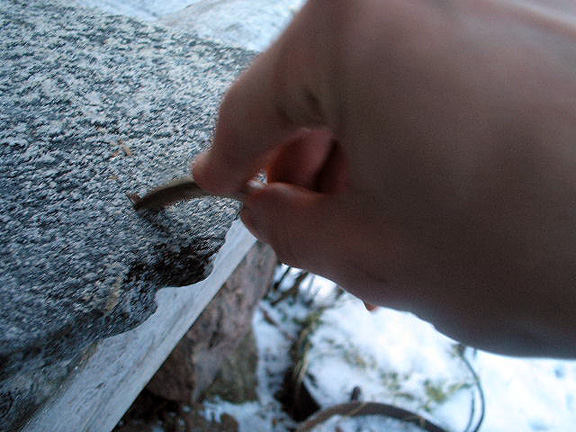
Grinding on a piece of rock.
Grinding is very simple. Just move the wood back and forth on the stone while applying pressure. This is one of the few tasks which I find is more easily done when the wood is properly dry. Also, I don't use water when grinding wood, but remove the surface dust ever now and then if it develops a glaze. Grinding along the grain is rather slow and difficult, but yields a smoother result. To get work done quickly, Abrade across the grain. This will more than likely be the side which will be longest as well, which will allow you go connect more surface to the stone on every stroke, and thus increase the amount of material removed on every pass.
When grinding rounded objects you can put some loose sand in a piece of leather or birch bark and use it more or less as a regular piece of sandpaper.
If a high polish is the aim, you need to burnish the wood as well as grinding it. That is achieved by compressing the fibres with a harder material, like bone, antler or a hard glossy stone. In a addition to beauty, burnishing will make the wood more water resistant and resilient.
Drilling
There are primarily two types of drills to use when making a hole in wood. One is the cutting type, which uses it's sharp edges to deepen and enlarge the hole. The bit can be unmodified or knapped rock. If it is available to you, quartz crystals is an excellent alternative. The speed is the primary advantage of this method, but it does not work too well on deep holes.
The other method involves burning a hole with friction. The drill point can be made of bone, antler or wood. With this method it is easier to go deeper than with stone, since the wedging effect can be avoided (if the drill is cylindrical). Antler and especially bone, will however become very brittle when it gets heated, increasing the risk of breaking the point in the hole. Whether ivory works the same way I have yet to test.
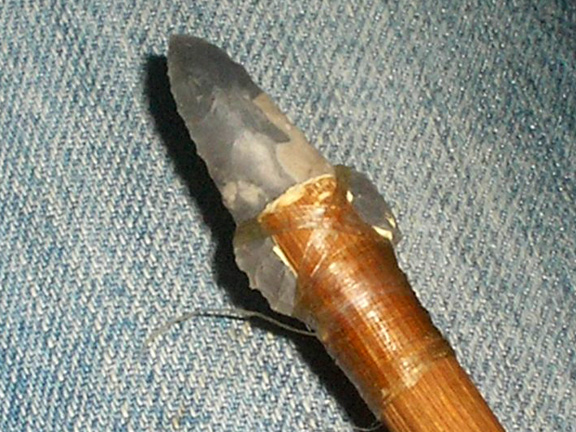
This is the type of drill head I find most effective. Knapped flint. It is hafted in a shaft and used the same way as a hand drill.
Making deep holes with any form of primitive tools is usually impractical. The chance of the drill bit breaking in the hole is great when it is deep, make drilling the hole very difficult, if not impossible. To avoid drilling too deep, I often drill from both sides, joining the holes in the middle.
When almost through, I usually take a bone awl and gently push through the rest of the material, being careful not to split the wood. This will also enlarge the hole a little. It is quite possible to enlarge a hole made with friction by using a stone bit.
Preserving wood
Wood is self preserving, unless it has to endure contact with soil or water in combination with oxygen. To equalize the humidity of the piece and for making it more crack resistant, oil the wood regularly. Making the piece of equal thickness while it is still fresh and drying the wood as slowly as possible will also keep this from happening.
E-mail your comments to "Torjus Gaaren" at torjusg@gmail.com
Visit Torjus Gaaren's website at http://livingprimitively.com/ for more primitive skills and experiences on primitive living.
We hope the information on the PrimitiveWays website is both instructional and enjoyable. Understand that no warranty or guarantee is included. We expect adults to act responsibly and children to be supervised by a responsible adult. If you use the information on this site to create your own projects or if you try techniques described on PrimitiveWays, behave in accordance with applicable laws, and think about the sustainability of natural resources. Using tools or techniques described on PrimitiveWays can be dangerous with exposure to heavy, sharp or pointed objects, fire, stone tools and hazards present in outdoor settings. Without proper care and caution, or if done incorrectly, there is a risk of property damage, personal injury or even death. So, be advised: Anyone using any information provided on the PrimitiveWays website assumes responsibility for using proper care and caution to protect property, the life, health and safety of himself or herself and all others. He or she expressly assumes all risk of harm or damage to all persons or property proximately caused by the use of this information.
© PrimitiveWays 2013