A lot of what I use a knife for is little stuff where I don't need a big knife so why not make a little one? The simplest material to start with is a hacksaw blade. One could make a half-assed knife out of a hacksaw blade by just grinding away the part you don't want, but why not do it right? This is one place where cheaper is better. Expensive hacksaw blades are made from so-called high-speed steel. That means that the teeth don't get soft from the friction heat caused by vigorous sawing. They are made from a steel alloy including tungsten, chromium and other refractory metals. Consequently they require carefully controlled extremely high temperatures and a non-oxidizing atmosphere for hardening. On the other hand, plain high-carbon steel blades soften with friction heating, but they can be easily heat treated in the comfort of your own garage.
Selecting the right material
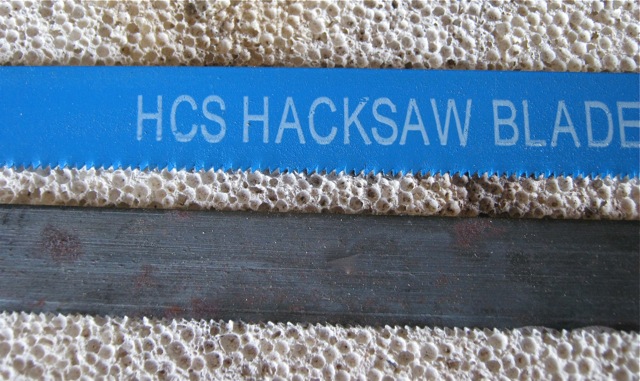
The hacksaw blades you want will be relatively inexpensive. Starrett sells "Grayflex" hacksaw blade. They are made from 1095 steel. That means iron plus 0.95% by weight of carbon and not much else. That's near the top of the list for people who make carbon steel knives. It's relatively easy to heat treat and inexpensive. It's main disadvantage is that it rusts easily, so wipe it off after you cut a lemon. Another source of carbon steel hacksaw blades is (you guessed it) Harbor Freight. They will sell you 50 blades with the "HCS" designation for the princely sum of $4.99. I presume that HCS means High Carbon Steel. If the hacksaw blades are advertised as "bimetal" or "high speed steel" or are relatively expensive, you will have great difficulty heat treating them.
If you only have "mystery metal", then try heat treating a sample before going to the effort of making a blade. Heat the sample red hot and let it cool slowly. You should now be able to easily shape it with a file. Then heat it red hot and quickly dunk it in water. It should be hard enough that a file won't scratch it. There is a detailed description of the process of heat treating steel in "The Miracle of Steel Heat Treatment", found on the PrimitiveWays.com website. You should end up with what an "Exacto" blade should be but isn't, a small thin blade that starts sharp and stays sharp.
First step: Soften the entire blade
A typical high-carbon steel hacksaw blade is differentially tempered. That means that the teeth are heat treated to be very hard and brittle, but the main body of the blade is softer so it won't shatter. Before shaping you want the whole blade to be soft so it is easily shaped. Heat one or more blades in the muffle furnace to medium red heat and let it/them cool slowly. Don't do this in direct sunlight because you need to judge the temperature by the color and bright light makes it difficult to judge the color of the glowing blade. The blade may warp as it cools. While it is in the soft state you can straighten it by hand.
Second step: Shaping the blade
Cut it to the desired length, about 3 inches (7.5 cm) and then get busy with a fine file. It is very helpful to clamp the blade to a board and then secure the board in a vice so that you have both hands on the file. See Figure X. I recommend not making the cutting edge longer than about 1 inch (2.54 cm).
I don't think it matters whether you put the cutting edge on the toothed side or the smooth side. I suggest filing into the blade rather than away from it. This seems to produce less "feather edge".
Get it as sharp as you can with the file and then go over the edge with coarse and medium whetstones. Remember, it's much, much easier to shape the metal before it is hardened.
I recommend a bevel angle for the cutting edge to be from 12 to 15 degrees. This gives an included angle from 24 to 30 degrees.
Third Step: Harden the blade
The objective is to harden the blade. You do this by heating it to medium red heat and then cooling it rapidly (quenching) in some appropriate liquid. For a quenchant I have used motor oil, salad oil and hot water. I prefer hot water because it is less messy.
Put the can of water close to the muffle furnace because you will want to transfer the red hot blade quickly from the furnace to the quenching fluid.
Heat the water with your torch until it is unpleasantly hot to the touch. Quenching in hot water is not as drastic as quenching in cold water. In the past I have had cracking problems when quenching somewhat thicker 1095 steel in cold water.
Put the blade in the muffle furnace and heat it to medium red, about 1500 F (816 C). Pull it out and quickly quench it in the hot water. If you did it correctly you will be unable to scratch the steel with a file. The main cause of lack of success is that you didn’t get it hot enough. Try to plunge the blade vertically into the quenchant. Otherwise one side may cool more slowly than the other and cause warping. Sometimes after quenching you will see that the blade is curved. Not good. In order to reduce this tendency be sure that the blade is flat before you heat it and leave it at medium red heat for at least two minutes.
Warning: At this stage the blade is very hard, but also very brittle. Don't try bending it.
Tempering
Tempering is a compromise between hardness and toughness. Some (wood carvers for example) want the edge to be very hard so it will stay sharp. Others want the edge to be less hard so it will be easier to sharpen and not shatter under strong abuse. My preference is for a very hard edge and tougher back. Hence differential tempering. Differential tempering is nothing new. Japanese swords were made that way over five hundred years ago. My approach is the following:
1. Harden the entire blade by heating it red hot and then quenching. That should include part of the tang ( the part that would be inserted in the handle).
2. Do initial tempering on the entire blade. Heat your kitchen oven up to the desired temperature and leave it in until the blade has reached the selected temperature (I use 350 F). The bladesmiths who forge big thick testosterone-infused tactical fighting survival knives talk about one or two hours in the tempering oven. That's because it takes a long time for a big fat piece of steel to reach equilibrium temperature. A piece of a hacksaw blade that is only .025 inches thick will reach thermal equilibrium in about ten minutes. The following table is for 1095 steel:
| Temperature | Rockwell C | Application |
|---|---|---|
As quenched |
66 |
Extremely hard and brittle |
400 F |
62 |
Woodcarving knife |
500 F |
60 |
|
550 F |
58 |
Some heavy duty “survival” knives |
Figure X, taken from Heat Treatment and Properties of Iron and Steel by Thomas G. Digges, Samuel J. Rosenberg, and Glenn W. Geil tells us how tempering temperature and time influence the hardness of a particular type of carbon steel.
c. Do differential tempering. For this process we use oxide color as an indicator of temperature and time, just like the pre-literate pre-scientific bladesmiths of yesteryear. It worked for them. After hardening and tempering the entire blade, polish it with emery cloth until you see shiny metal. Then hold it in such a way that the cutting edge is in contact with a damp paper towel. The reason is to keep the cutting edge cool while you heat the back of the blade. Next, using a narrow pencil flame, heat the back of the blade until you see a blue oxide layer develop. The color of the oxide layer is a fairly reliable indicator of the temperature. Blue is what you want. You initially polish the surface so you can see the oxide color. You also want to do this in a well illuminated space.
d. Get it sharp. I started out with seven different abrasives from coarse to . . . to fine to 3 micron aluminum oxide to cerium oxide optical polish. Raise your standards for sharpness.
e. Make a sheath or handle.
What you will need:
high-carbon steel (cheap) hacksaw blades (One or more)
pliers (at least one pair)
A propane torch (Bernzomatic) with both broad and pencil tip heads
A "C" clamp
A board to clamp the blade to while shaping with a file.
A small soup can full of water for quenching
A muffle furnace for heating the blades. This consists of an enclosure surrounded by refractory material. It allows the heat from your torch to be evenly distributed over the area of the blade. Mine is made from porous firebrick but in the past I used one made from a soup can and adobe clay. Fill the can with dampened mud or clay and insert a 1 inch square piece of wood to make the cavity. Pull the stick out and let it dry. Then poke a hole in the bottom of the can so you can blast it with the torch.
Figure 1: High carbon steel hacksaw blades before and after annealing.
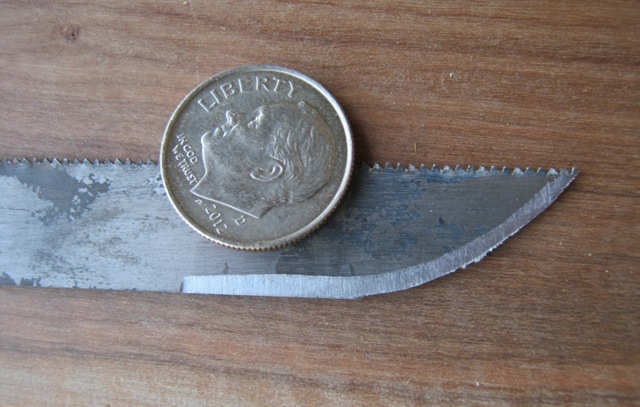
Figure 2: Preliminary shaping with a file.
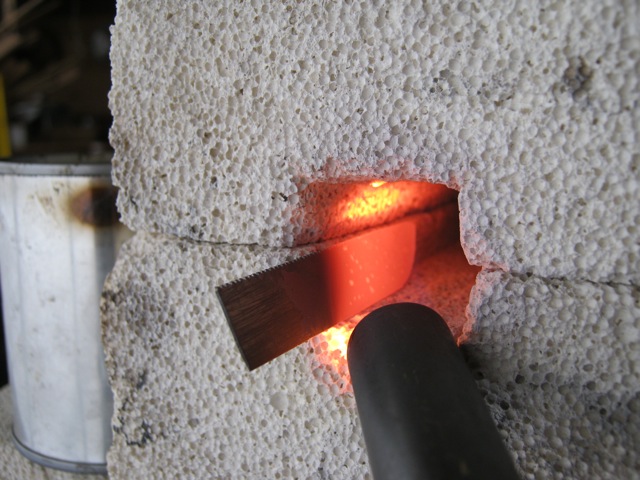
Figure 3: Heated red hot in the furnace.
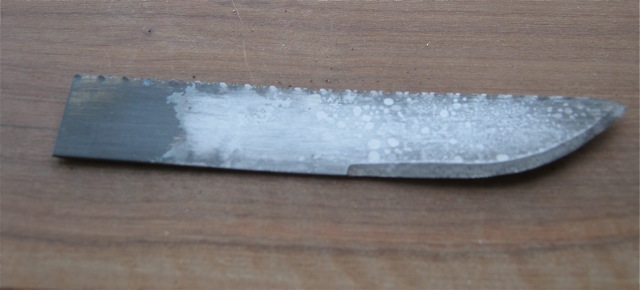
Figure 4: After quenching and polished with emery cloth.
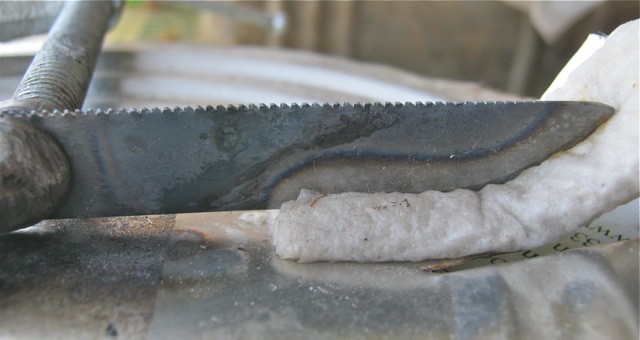
Figure 5: Differentially tempered with the back softened and the edge hard.
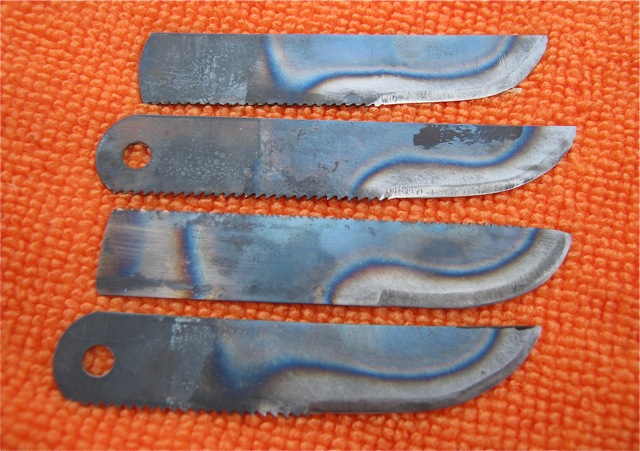
Figure 6: Some finished Walletknife blades.
Figure 7: Hardness versus time and temperature from Heat Treatment and Properties of Iron and Steel by Thomas G. Digges, Samuel J. Rosenberg, and Glenn W. Geil
References:
"The Shade Tree Knife Mechanic" and "The Miracle of Steel Heat Treatment" on the PrimitiveWays.com website.
Heat Treatment and Properties of Iron and Steel by Thomas G. Digges, Samuel J. Rosenberg, and Glenn W. Geil online
E-mail your comments to "Richard A. Baugh" at richardbaugh@att.net
We hope the information on the PrimitiveWays website is both instructional and enjoyable. Understand that no warranty or guarantee is included. We expect adults to act responsibly and children to be supervised by a responsible adult. If you use the information on this site to create your own projects or if you try techniques described on PrimitiveWays, behave in accordance with applicable laws, and think about the sustainability of natural resources. Using tools or techniques described on PrimitiveWays can be dangerous with exposure to heavy, sharp or pointed objects, fire, stone tools and hazards present in outdoor settings. Without proper care and caution, or if done incorrectly, there is a risk of property damage, personal injury or even death. So, be advised: Anyone using any information provided on the PrimitiveWays website assumes responsibility for using proper care and caution to protect property, the life, health and safety of himself or herself and all others. He or she expressly assumes all risk of harm or damage to all persons or property proximately caused by the use of this information.
© PrimitiveWays 2014