This method is as simple as the process of braintanning gets. It has the fewest steps of any braintanning method and requires the fewest refined techniques. It is not, however, the easiest labor-wise. This was written in answer to, and to clarify many beginning tanner’s bewilderment with the myriad of different methods of braintanning currently being taught and championed in books, DVDs and especially on internet forums. These different methods are often mixed and matched unwittingly and have varying results, and some folks come away with a negative experience of tanning and are unable to sort out what works and what does not in order to reliably tan good hides. While these other methods are reliable once learned, they often require some extra steps, which if not followed correctly, can produce very poor results. This article is not meant to detract in any way from the other methods available. I tan most of my hides using a more complicated process due to its labor saving steps and I am grateful to those who have done the research to develop it!
For this tutorial, I elected to tan the hide pictured with (nearly) all Stone Age tools and equipment to show what can be done and how it can be accomplished in a primitive situation. The hide is worked fresh - right from the animal with no soaks in anything. In a nutshell: flesh the hide, turn it over and grain the hide. Soak/manipulate in brain/water mix (braining), wring, brain & wring, brain & wring, brain & wring, open the hide and soften, smoke the hide to finish. If the hide is not as soft as desired after softening until dry, go ahead and smoke the hide, rebrain & wring and resoften and resmoke. Works every time.
HERE WE GO!
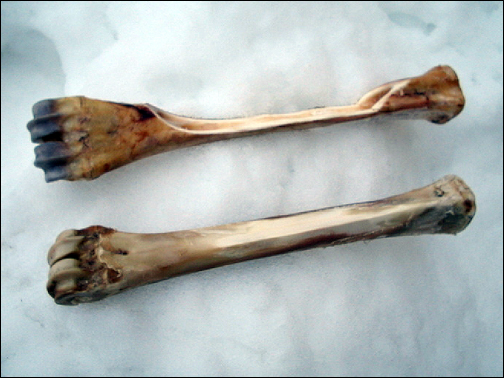
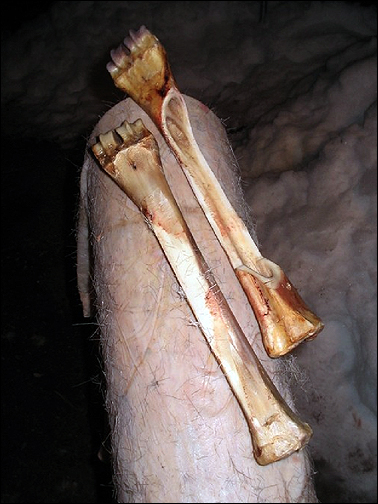
Two elk leg bone scrapers. One has an edge that has been narrowed and sharpened without splitting the bone; the other has been split to expose two sharp edges. I used both an upright beam and a waist beam for this project. I am most comfortable on the waist beam because that is what I have used for 20 years.
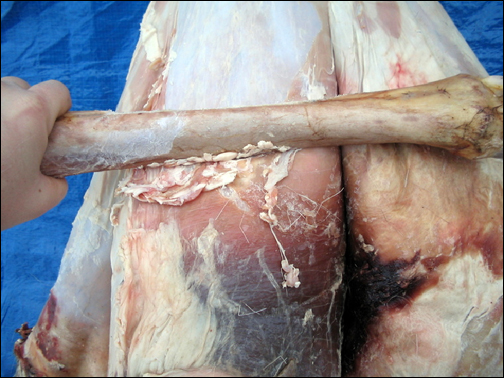
This next picture is fleshing the hide with one of the scrapers. Simply push or pull the flesh from the hide with the scraper on your choice of beams.
Fleshing progress
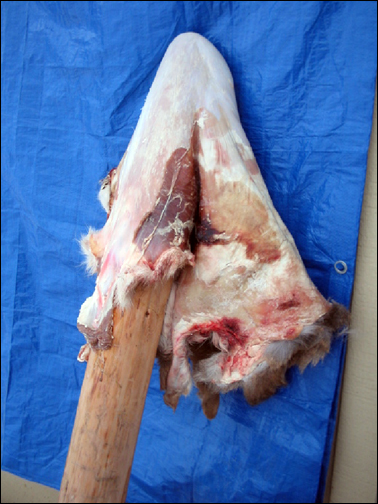
Fleshing complete
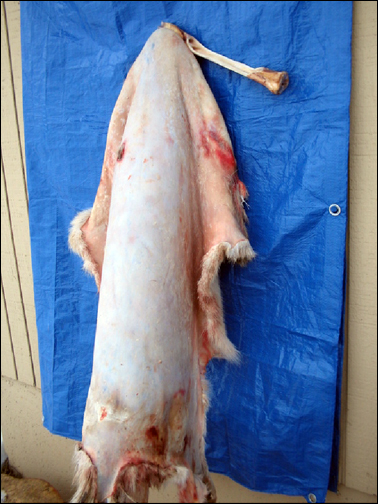
Fresh-scrape graining:
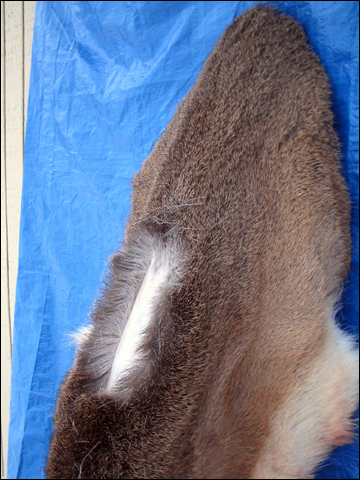
Now we flip the hide over exposing the hair side. We scrape the hair and the grain layer (top layer) of skin at the same time. This requires a bit of arm and upper body strength. It also takes some practice to get it right. Some parts of the hide are fairly easy to scrape (sides and rump), some will tear easily (armpits), some will stand up to all the abuse you can throw at it (back, neck). Start with small strokes and try to get them to slightly overlap to ensure you get it scraped clean. If you get grain streaks, no worries; it will still work.
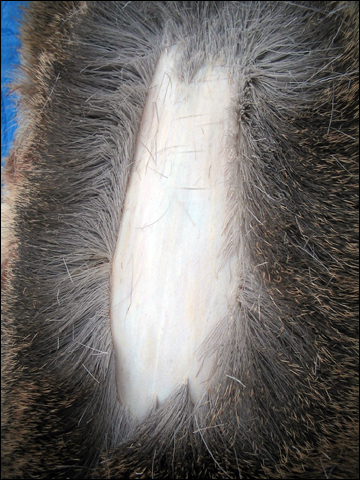
Switching to waist beam for comfort - close up of scraper & hide. You can see streaks of grain pretty easily. I will remove those as I go.
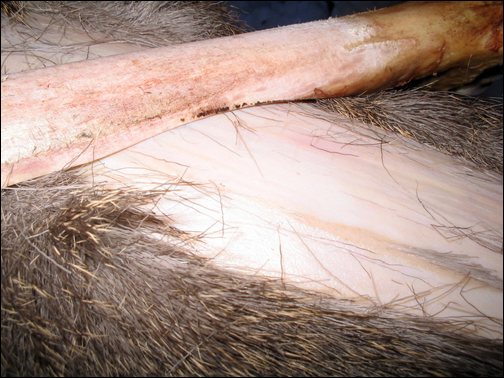
Picture of the scrapers on the grained hide. The bone scrapers dulled pretty fast and the working edge had to be retouched. I probably sharpened each about 6 times throughout the process.
Braining and Wringing:
After the graining is complete, it is time to brain the hide. Take about a pound of brains and mix thorougly with about a quart of water. Liquify the brains as best as you are able, then add that slurry to about 3 quarts of warm water. The finished mix should be no hotter than you are able to keep your hand in for 30 seconds without getting burned or screaming your head off. If it is hotter than this, you will cook your hide - not good. It comes apart. I like the brains good and warm, but not too hot. Put the hide into the brains (sorry, no pictures of this part of the process) and begin to agitate and stir around. Use your hands and stretch and manipulate the hide in all directions, systematically working all the areas of the hide. Work the edges by grabbing them tight and pulling the hide until the edge pulls from your hand/through your fingers. This will work the edge clear to the very edge. If you don't, you will end up with an inch or so of very stiff hide at the perimeter, and it can cost you over a square foot of useable hide in the long run. Manipulate the hide in this manner for 15-30 minutes or until the hide is evenly soaked through with the brain mix. Merely soaking in the brains without actively working the hide does very little. I avoid it and consider it wasted time.
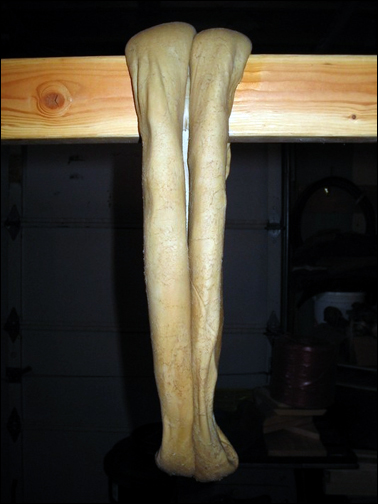
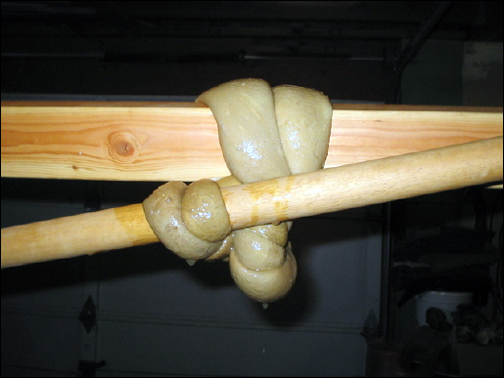
When braining is done, lift the hide from the brains by either the neck or the tail end and use your hand to squeeze all the brains you can from the hide. Hang the butt section of the hide over a pole parallel to the ground and allow about 8-10" or so to hang over the other side of the pole. From the other side, lift the neck section of the hide and lay it over the butt section the other way and allow 8-10" to hang over/overlap. This creates a loop of flat hide. Then start at one end and evenly roll the hide toward the middle.
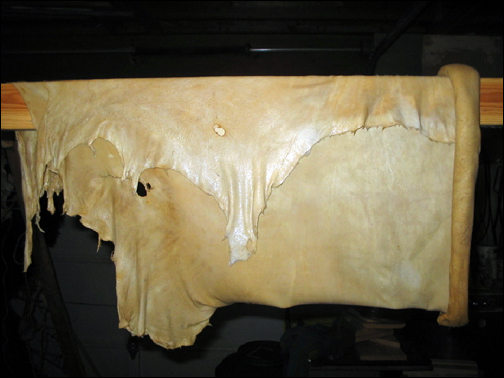
Photo shows the hide on the pole with the neck overlapping the rest of the hide, rolled most of the way from the right side toward the middle.
My apologies for having to turn your head sideways on the next 3 shots. This is the hide rolled to the middle from both sides.
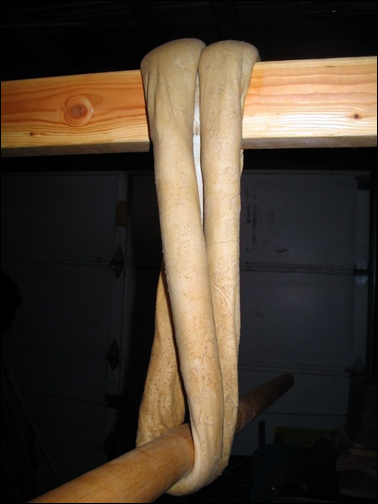
The bottom or wringing bar is inserted and twisting/wringing begins.
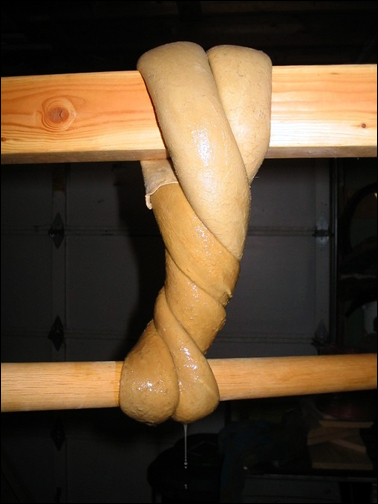
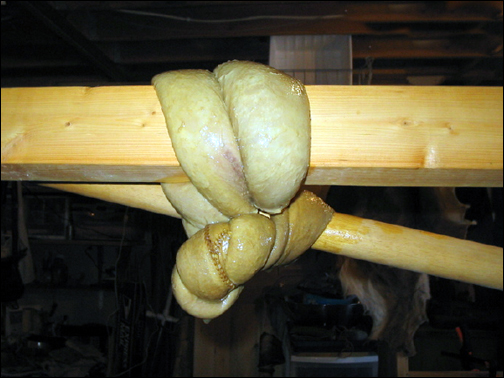
And continues - you can see liquid beginning to be squeezed from the hide.
The hide is twisted very tightly, the wringing stick secured, and the hide allowed to drip until it quits. This may take 15 minutes or so.
Then untwist the hide and twist it in the opposite direction - same process.
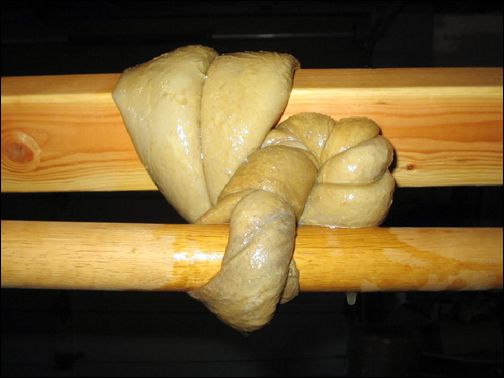
Then untwist, rotate your hide donut on the pole about 90 degrees to expose wetter hide to the hard wringing, and repeat again.
The next step is to untwist the hide and unwrap it. Lay it over your pole and begin to pull the hide open and stretch in many directions to loosen the hide fibers and get everything moving. Then back into the brains and repeat braining and wringing steps. After the last braining & wringing, then open the hide well and begin to soften. For those who can tell, this hide above was softened once until dry, and was not as soft as I prefer, so it was smoked and rebrained. These images were taken on the second set of braining and wringing, since I forgot on the first go around.
E-mail your comments to "Patrick Farneman" at patrickf@bridgestothepast.org
Visit www.bridgestothepast.org and join us in the journey of discovering our roots - the ancient ways and skills that help define who we are. Bridges to the Past is a non-profit organization dedicated to education and preservation of our shared human history through the skills of our ancestors.
We hope the information on the PrimitiveWays website is both instructional and enjoyable. Understand that no warranty or guarantee is included. We expect adults to act responsibly and children to be supervised by a responsible adult. If you use the information on this site to create your own projects or if you try techniques described on PrimitiveWays, behave in accordance with applicable laws, and think about the sustainability of natural resources. Using tools or techniques described on PrimitiveWays can be dangerous with exposure to heavy, sharp or pointed objects, fire, stone tools and hazards present in outdoor settings. Without proper care and caution, or if done incorrectly, there is a risk of property damage, personal injury or even death. So, be advised: Anyone using any information provided on the PrimitiveWays website assumes responsibility for using proper care and caution to protect property, the life, health and safety of himself or herself and all others. He or she expressly assumes all risk of harm or damage to all persons or property proximately caused by the use of this information.
© PrimitiveWays 2013